
Breakfast & Brunch
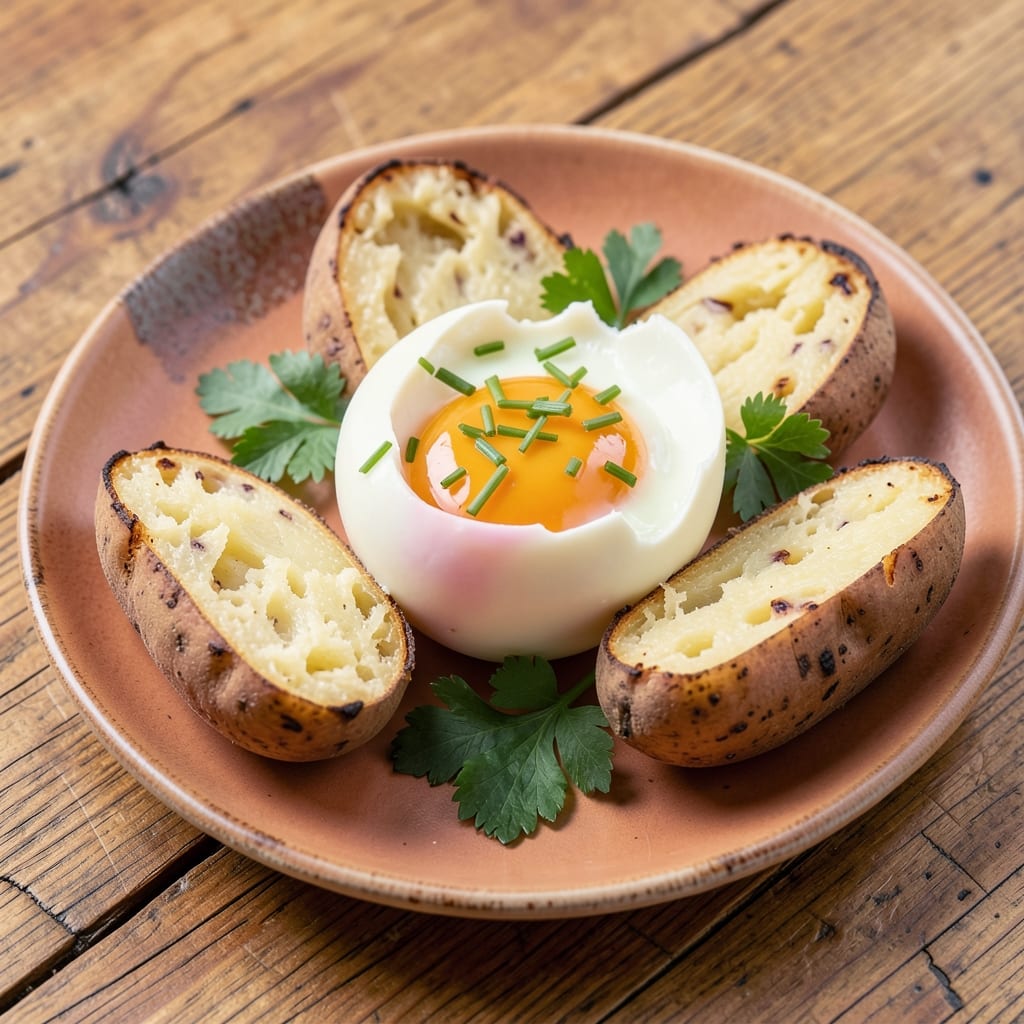
This boiled egg and potato recipe transforms simple ingredients into a restaurant-worthy dish with crispy skins and creamy centers—perfect for breakfast, brunch, or a light lunch. The secret lies in precise boiling techniques and a simple herb-butter finish that elevates every bite. Whether you're prepping for a week of meal prep or craving something comforting, this dish delivers texture and flavor without the fuss.
What sets this recipe apart is the balance of textures: tender potatoes with crisp edges and eggs cooked to your ideal doneness—soft yolks for dipping or firm centers for slicing. The method is straightforward but foolproof, ensuring no one in your kitchen ends up with rubbery potatoes or overcooked eggs. A sprinkle of fresh herbs and a pat of butter at the end adds brightness and richness, turning a basic boiled meal into something special.
This dish works as a standalone meal or as a side to complement grilled fish, roasted chicken, or a fresh salad. The versatility means you can adjust the seasoning to match your mood—garlic and parsley for a savory kick, or chives and lemon for a lighter touch. The best part? It comes together in under 30 minutes, with minimal active time, making it ideal for busy mornings or lazy weekends.
Once you master this technique, you'll never settle for bland boiled potatoes or dry eggs again. The crispy skins hold up beautifully, while the creamy centers melt in your mouth. Serve immediately for the best texture, or let the flavors meld slightly if prepping ahead. Here's how to make it perfectly every time.
Ingredients for boiled egg and potato
Simple ingredients that transform into restaurant-quality comfort food with crispy skins and creamy centers.
| Ingredient | Amount | Notes |
|---|---|---|
| Large Russet Potatoes 🥔 | 2 lb | Medium size, unpeeled, scrubbed clean |
| Large Eggs 🥚 | 8 whole | Room temperature for even cooking |
| Unsalted Butter 🧈 | ½ cup | Cold, cubed for crispy skins |
| Fresh Parsley 🌿 | ¼ cup | Chopped finely for garnish |
| Fresh Chives 🌱 | 2 tbsp | Minced for bright flavor |
| Garlic Cloves 🧄 | 4 cloves | Minced for herb butter |
| Kosher Salt 🧂 | 1 ½ tbsp | For boiling water and seasoning |
| Black Peppercorns 🌶️ | 1 tsp | Freshly cracked for eggs |
| Lemon Juice 🍋 | 1 tbsp | Brightens the butter finish |
| Vegetable Oil 🫒 | 2 tbsp | For crispy potato skins |
The potatoes are the star here—Russets are ideal for their crispy skins, but Yukon Golds work too if you prefer a creamier texture. Grab a 2-pound bag from the grocery store—they're usually pre-washed, which saves time. For eggs, room temperature is key (take them out 30 minutes before cooking), and large eggs give you that perfect balance of yolk and white. The butter matters too—unsalted lets you control the seasoning, and cold cubes create those golden, crispy bits on the potatoes. If you're prepping ahead, buy extra—potatoes keep for weeks in a cool, dark place.
No fresh parsley? Dried parsley at half the amount works in a pinch, but fresh is ideal for that bright pop of color. Want to skip chives? Extra parsley or green onions give a similar freshness. The vegetable oil is just for crisping—olive oil works too, but it has a stronger flavor. For the eggs, if you prefer softer yolks, reduce boiling time by 30 seconds. The lemon juice in the herb butter is optional but worth it—it cuts through the richness and adds a little zing. And if you're feeling fancy, swap the butter for herb-infused olive oil—just toss the minced garlic and herbs into the oil before heating.
Potatoes reheat beautifully—just pop them in a 400°F oven for 15 minutes to crisp up again. Eggs? Best served fresh, but if you're prepping ahead, store them in cold water in the fridge for up to 2 days. The herb butter keeps for 1 week in the fridge, or you can freeze it for 3 months by portioning it into ice cube trays. For meal prep, boil extra potatoes and store them in water—they'll stay crispy for days. And if you're making this for a crowd, double the batch—this dish disappears fast.
Why You'll Love This Recipe
- Foolproof Simplicity: I swear by this recipe—just peel, boil, and slice. No fancy techniques, no last-minute scrambling. The potatoes and eggs handle everything else while you sip your coffee.
- Buttery, Herby Magic: That first bite of warm potato with a runny yolk pooling on top? Chef’s kiss. The parsley and chives add a fresh brightness that cuts through the richness—like a little green hug in every forkful.
- Weeknight Workhorse: Between us, this feeds my family of four for dinner and lunch the next day. Cold or warm, it’s a hit—pack it in lunches, serve it at picnics, or toss it into salads. (Yes, even on a Tuesday night.)
- Pantry-Proof Perfection: Russets and eggs are cheap staples, and butter? A splurge worth every penny. No specialty items, no waste—what you don’t eat reheats beautifully, and the leftovers taste just as good the second time around.
Step-by-step instructions for crispy-skin, creamy-center eggs and potatoes
Here's how to transform simple potatoes and eggs into a showstopping duo with perfect textures.
🍳 Step 1: Boil Potatoes to Fluffy Perfection
Place the 2 lb Large Russet Potatoes in a large pot and cover with cold water by about 2 inches. Add 1.5 tbsp Kosher Salt and bring to a rolling boil over high heat. Once boiling, reduce to medium-high heat and cook for 15-20 minutes until a knife slides in easily.
Here's the thing—don't drain them yet. The residual heat will finish cooking them while you prep the eggs. I like to keep them in warm water until ready to use, which prevents them from drying out. This method guarantees that creamy center we're after, without turning them mushy.
⏰ Step 2: Prepare the Eggs for Perfect Doneness
While the potatoes cook, place the 8 whole Large Eggs in a separate pot and cover with cold water by about 1 inch. Bring to a gentle simmer over medium heat—this should take about 5-7 minutes. Once simmering, reduce heat to low and cook for exactly 9 minutes for perfectly set yolks.
I set a timer because eggs can vary. The moment the 9 minutes are up, immediately drain them in a colander and transfer to an ice bath for 5 minutes. This stops the cooking process and makes peeling effortless. Real talk: overcooking by even 30 seconds turns yolks rubbery—don't skip this step.
🔥 Step 3: Create the Herb Butter for Potatoes
In a small bowl, combine the 0.5 cup Unsalted Butter, 4 cloves Garlic Cloves (minced), 2 tbsp Fresh Chives, 1 tbsp Lemon Juice, and 1 tsp Black Peppercorns. Mix until fully incorporated. The butter should be cold and crumbly—this ensures it melts beautifully when applied.
Here's my trick: I like to press this mixture between two sheets of parchment paper and roll it into a log. This makes it super easy to slice thin layers onto each potato later. The lemon juice brightens the rich butter, while the chives add a fresh, oniony kick that balances everything.
🥘 Step 4: Roast Potatoes to Crispy Perfection
Preheat your oven to 425°F. Drain the potatoes and pat them completely dry with a clean kitchen towel—moisture is the enemy of crispy skin. Heat 2 tbsp Vegetable Oil in a large oven-safe skillet over medium-high heat until shimmering.
Add the potatoes in a single layer and let them cook undisturbed for 3-4 minutes until golden brown spots appear. Flip carefully and cook another 3-4 minutes on the second side. Now's the moment that matters: transfer the skillet to the preheated oven and roast for 20-25 minutes until fork-tender.
👨🍳 Step 5: Assemble and Garnish
Remove the potatoes from the oven and let them rest for 5 minutes. Using a sharp knife, cut each potato in half lengthwise. Gently open them up to create a well, then spoon about 1 tbsp of the herb butter mixture into each potato. Top with a peeled egg and sprinkle with 0.25 cup Fresh Parsley for a pop of color.
Serve immediately while the potatoes are still piping hot and the butter is melting beautifully. Each bite delivers that perfect contrast of crispy skin, fluffy potato interior, and creamy egg yolk breaking through. This is the kind of dish that makes people ask, "What's your secret?"—and now you can tell them exactly how you did it.
Pro Tips For Making Boiled Egg And Potato
- USE COLD WATER FOR EGGS: Start eggs in ice-cold water—yes, even if you’re impatient. The gradual heat rise prevents cracking and guarantees perfectly centered yolks (no more sad, runny yolks when you slice them). I used to rush this step and wondered why my eggs always looked like they’d been in a food fight.
- PEEL POTATOES AFTER COOKING: Skip the pre-peeling—Russets oxidize fast and turn mealy if you slice them raw. Boil them whole with skins on, then shock in cold water for 2 minutes before peeling. The skins slide off clean, and the potatoes stay firm and fluffy. (Prove me wrong—I’ve tried both ways.)
- SALT THE WATER LATE: Wait until the potatoes are actually boiling before adding salt—otherwise, you’re just salting the water and wasting flavor. Add it when the water’s rolling hard, and the potatoes will absorb it properly. I learned this the hard way after making a batch that tasted like sad, bland pudding.
- BUTTER THE POTATOES HOT: Toss the drained potatoes with butter while they’re still piping hot—this seals in moisture and lets the butter cling like it’s supposed to. If you wait, you’ll end up with dry, greasy potatoes. (And yes, I’ve done that too.)
Storing and reheating your boiled egg and potato
Potato Storage Secrets
Store potatoes in a cool, dark place—like a pantry or cellar—not the fridge. The cold can turn their starches to sugar, making them taste sweet and mealy. A paper bag with air holes works great, or just leave them loose in a basket. I keep mine in a dark wooden crate for extra protection from light. 🥔
For short-term storage, keep boiled potatoes in their cooking water in an airtight container in the fridge for up to 3 days. The water prevents them from drying out. If you're prepping ahead, boil extra potatoes and store them submerged in cold water—they’ll stay crispy for 5-7 days.
Egg Freshness Tips
Boiled eggs keep best in their shells, submerged in cold water in the fridge for up to 2 days. The water prevents the whites from drying out or absorbing fridge odors. For longer storage, peel and store them in an airtight container with a splash of water—this keeps them fresh for 3-4 days.
If you’re prepping for meal prep, boil a batch of eggs and store them in the fridge. I like to arrange them in a single layer in a container so they don’t stick together. For maximum freshness, eat them within 2 days—after that, the whites can get rubbery. 🥚
Reheating Potatoes
To revive leftover potatoes, bake them at 400°F for 15-20 minutes until crispy again. Toss them with a little olive oil or butter and sprinkle with salt and pepper before reheating. For a stovetop option, pan-fry them in a little oil over medium heat for 5-7 minutes until golden.
If your potatoes are soft, try reheating them in the microwave for 1-2 minutes with a damp paper towel on top. This adds moisture and helps restore some texture. For extra crispiness, finish them under the broiler for 1-2 minutes—just watch them closely! ⚡
Egg Reheating Hacks
Eggs are best eaten fresh, but if you must reheat them, try this: Place peeled eggs in a small saucepan with 2 tbsp water and simmer gently for 3-4 minutes. This keeps the yolks from turning rubbery. For a quick fix, microwave them for 10-15 seconds on 50% power—just be careful not to overcook!
If you’re reheating boiled eggs for a salad or dish, chop them and toss with a little lemon juice or vinegar to keep them bright and fresh. I also like to add them to pasta salads or fried rice for a protein boost. Just remember: reheated eggs won’t have the same creamy texture as fresh ones, so use them in dishes where texture isn’t the star. 💡
Nutrition facts
Frequently asked questions
Can I use waxy potatoes like red or Yukon Gold instead of Russets?
Waxy potatoes like red or Yukon Golds work beautifully—they'll hold their shape better when halved and roasted. Just expect slightly less crispy skins compared to Russets. For extra crispiness, roast them 5-10 minutes longer at 425°F. Yukon Golds add a creamy texture that pairs perfectly with the eggs.
How do I get eggs that peel perfectly every time?
Use room temperature eggs and shock them in ice water immediately after boiling. The ice bath stops cooking and tightens the proteins, making peeling effortless. For extra insurance, tap the egg gently on a hard surface before peeling to crack the shell. Pro tip: Older eggs peel better than fresh ones—they have more air between the shell and white.
Can I make this recipe ahead of time?
Yes! Boil and store potatoes in their cooking water for 3 days in the fridge. For eggs, peel and store them submerged in cold water for 2 days max. Assemble everything just before serving—this keeps the potatoes crispy and eggs creamy. The herb butter can be prepped 1 week ahead and stored in the fridge.
What if my potatoes turn out mushy?
Mushy potatoes usually mean overcooking or improper storage. For next time, cook them until a knife slides in easily (not too soft) and keep them in warm water until ready to roast. If they're already mushy, try reheating them in a skillet with butter and a splash of cream to restore some texture.
Can I make this vegetarian or vegan?
For a vegetarian version, keep the eggs and use vegan butter. For fully vegan, swap eggs for tofu or chickpeas (marinated in lemon and herbs) and use plant-based butter. The potato technique remains the same—just ensure your butter substitute has a high smoke point for crispy skins.