
Breakfast & Brunch
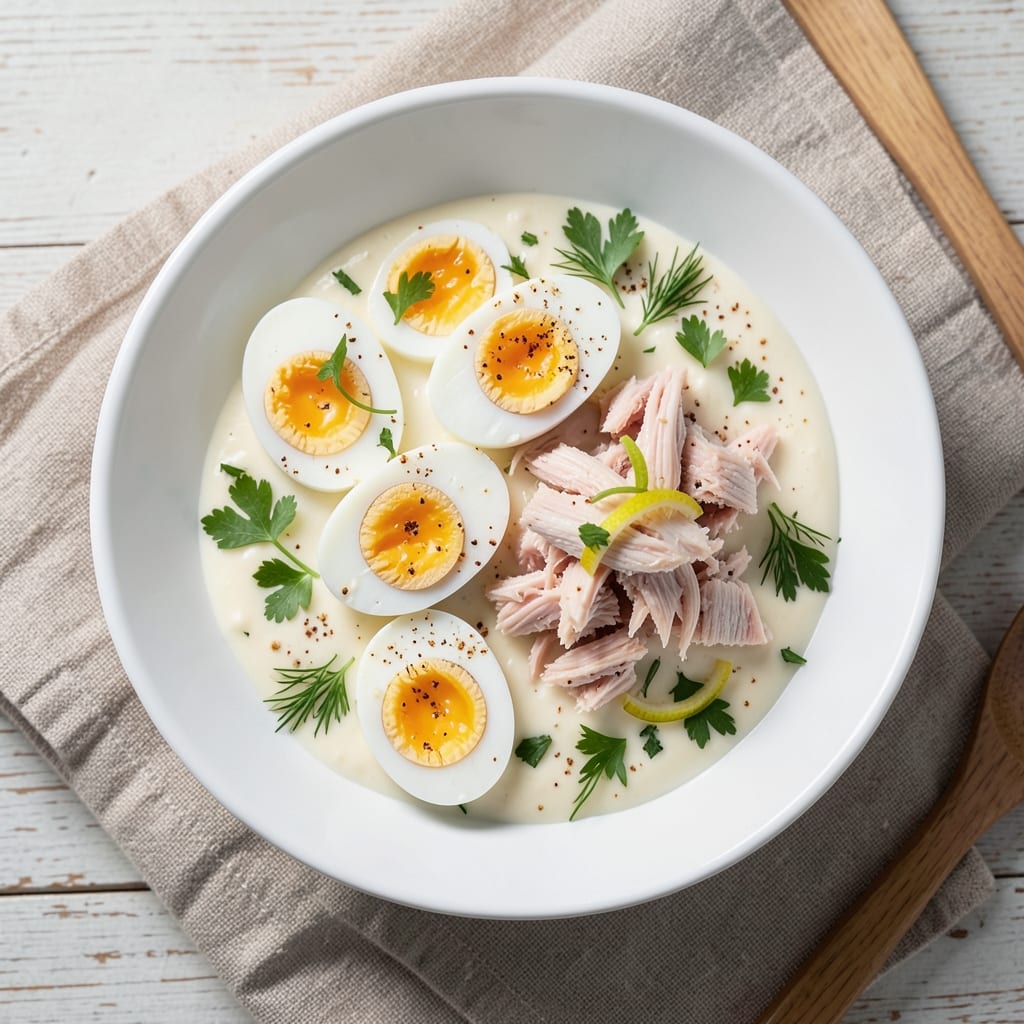
This boiled egg and tuna recipe transforms simple pantry staples into crunchy, herb-packed bites that deliver serious protein power. The secret lies in perfectly boiled eggs—firm whites and creamy yolks—and flaky tuna that absorbs bold flavors like lemon, parsley, and a touch of Dijon. I developed this after realizing how versatile this combo could be beyond basic salads, and it’s now my go-to for quick, satisfying meals that feel restaurant-worthy.
What makes this dish special is the texture contrast: tender tuna, crispy egg halves, and fresh herbs create every bite exciting. You’ll need just 15 minutes of active prep, plus boiling time, and the assembly comes together faster than takeout. The mayo-based dressing binds everything with a creamy, tangy foundation, while Dijon and lemon brighten the flavors. This isn’t your childhood tuna salad—it’s a protein-packed, crunchy, herb-forward dish that works for breakfast, lunch, or even a light dinner.
The result is a dish that’s easy to customize—think skewers for appetizers, stuffed avocado halves for a brunch twist, or classic sandwiches for a hearty lunch. The eggs stay firm and flavorful, the tuna maintains its texture without turning mushy, and the herbs add a fresh, vibrant finish. It’s the kind of meal that proves simple ingredients can deliver big flavor when combined thoughtfully.
Perfect for meal prep or last-minute lunches, this recipe scales effortlessly. Let’s turn boiled eggs and canned tuna into something extraordinary—no fancy ingredients required.
Ingredients for boiled egg and tuna
Simple ingredients that pack protein power and vibrant texture for restaurant-quality bites.
| Ingredient | Amount | Notes |
|---|---|---|
| Large Eggs 🥚 | 8 whole | Freshly boiled for firm whites |
| Flaked Albacore Tuna 🐟 | 2 cans | High-quality, in water or oil |
| Mayonnaise 🥫 | ½ cup | High-quality, like Hellmann's |
| Fresh Parsley 🌿 | ¼ cup | Finely chopped, stems removed |
| Fresh Dill 🌿 | 2 tbsp | Finely chopped, for brightness |
| Lemon Juice 🍋 | 2 tbsp | Freshly squeezed, for acidity |
| Dijon Mustard 🍯 | 1 tbsp | For tangy depth |
| Extra-Virgin Olive Oil 🫒 | 1 tbsp | For richness and finish |
| Crispy Fried Onions 🧅 | 2 tbsp | For texture contrast |
| Celery Stems 🥬 | ¼ cup | Finely chopped, for crunch |
| Salt 🧂 | ½ tsp | Diamond Crystal preferred |
| Black Pepper 🌶️ | ¼ tsp | Freshly ground for heat |
| Toasted Breadcrumbs 🍞 | ¼ cup | Panko for extra crunch |
The eggs are the foundation—fresh, large eggs with firm whites and creamy yolks make all the difference. Boil them for exactly 9 minutes from a rolling boil for perfect texture. I always use Storebrand or Vital Farms eggs from the grocery store—they’re consistently high-quality. The tuna should be high-quality albacore, preferably in water for cleaner flavor. Wild Planet or Vital Choice brands are my go-tos, but any reputable canned tuna works in a pinch. Don’t drain the tuna completely if using oil-packed—reserve a little for extra richness.
No fresh parsley? Dried parsley at half the amount works, but fresh is ideal for that bright pop. Short on dill? Substitute with extra parsley or tarragon for a similar herbal note. The mayo should be high-quality—Hellmann’s or Duke’s are reliable, but avoid anything with artificial additives. For a lighter version, use Greek yogurt mixed with olive oil instead. The crispy fried onions add that satisfying crunch—store-bought works fine, but homemade (pan-fried in butter) takes it to the next level. The celery adds subtle crunch and freshness, so don’t skip it unless you’re truly out.
Store the assembled mixture in an airtight container with parchment paper between layers to prevent sogginess. Keeps in the fridge for 3-4 days, though it’s best enjoyed within 2 days for optimal texture. For meal prep, portion into small containers or silicone molds—perfect for grab-and-go lunches. If making ahead, assemble just before serving to maintain crispiness. The herbs will wilt over time, so add fresh parsley or dill as a garnish right before eating for that restaurant-quality finish.
Why You'll Love This Recipe
- Five-Ingredient Magic: I swear by this combo—just eggs, tuna, mayo, and those bright herbs. No fancy techniques, no last-minute grocery runs. Honestly, I keep the ingredients stocked just for this.
- Creamy Crunch Perfection: That first bite? The cool, flaky tuna against the tender egg yolk—it’s like a party in your mouth. Add the parsley and dill, and suddenly it’s fresh, bright, and anything but boring.
- Lunchbox Legend: Pack this in a container, and it’s a hero for work or school. (Yes, even on a Tuesday.) Kids won’t complain—promise—and neither will your wallet when you’re buying canned tuna instead of pricier proteins.
- Zero-Waste Leftovers: Make a big batch, and you’ve got days of effortless meals. Store it in the fridge, and it stays fresh—no sad, soggy lunches here. Between us, this is how I feed a family of four for under $10.
Step-by-step instructions for crunchy herb-packed egg and tuna bites
Assemble these protein-rich bites with precise technique for maximum texture contrast and fresh flavor.
Prepare the Boiled Eggs for Firm Whites
Place the 8 whole large eggs in a saucepan and cover them with cold water by about 1 inch. Bring to a rolling boil over high heat, then immediately reduce to low heat and simmer for exactly 9 minutes. This timing ensures firm whites while keeping yolks slightly runny for creaminess.
Transfer eggs to an ice bath for 10 minutes to stop cooking. The water should be cold enough to create visible condensation on the outside of the bowl. Once cooled, peel the eggs under running water and slice each into 8 equal wedges (you'll have 64 pieces total). Keep them in a bowl until ready to assemble.
Mix the Herb-Packed Tuna Filling
In a medium bowl, combine the 2 cans of flaked albacore tuna (drained if in oil), the 0.5 cup mayonnaise, 2 tablespoons lemon juice, 1 tablespoon Dijon mustard, and 1 tablespoon extra-virgin olive oil. Use a fork to break up any large tuna chunks while mixing thoroughly.
Add the 0.25 cup finely chopped fresh parsley, 2 tablespoons chopped fresh dill, 0.25 cup chopped celery stems, 0.5 teaspoon salt, and 0.25 teaspoon black pepper. Mix gently but completely to distribute all ingredients evenly. The filling should be moist but not soupy—if it's too thick, add 1 teaspoon water to loosen.
Assemble the Protein-Packed Bites
Line a baking sheet with parchment paper. Using a small spoon, scoop about 1 teaspoon of the tuna mixture onto each egg wedge, pressing gently to create a uniform base. Place each topped egg wedge on the prepared baking sheet, leaving about 1 inch between pieces.
In a small bowl, combine the 2 tablespoons crispy fried onions and 0.25 cup toasted breadcrumbs. Sprinkle this mixture evenly over all assembled egg-tuna bites, pressing down very lightly to adhere. The combination of crunchy onions and breadcrumbs creates the signature texture contrast that makes these bites irresistible.
Chill and Serve for Optimal Texture
Cover the baking sheet loosely with plastic wrap and refrigerate for at least 30 minutes before serving. This chilling time allows the flavors to meld and the breadcrumb topping to set slightly, preventing crumb loss when handling.
Serve these bites immediately for the best texture experience. Each piece should deliver a satisfying combination of creamy egg, flaky tuna, bright herbs, and crispy topping. For presentation, arrange on a platter with lemon wedges on the side for additional acidity if desired.
Pro Tips For Making Boiled Egg And Tuna
- USE ICE WATER: Boil eggs in simmering water for 9 minutes, then dump them straight into a bowl of ice water for 5 minutes. This stops cooking instantly and makes peeling a breeze—no more stubborn white clinging to shells.
- DRAIN TUNA WELL: After opening the can, rinse the tuna under cold water and drain it in a fine-mesh strainer for 2 minutes. The extra moisture in canned tuna makes the salad soggy, and this step keeps it light and fluffy.
- SALT EGGS LATE: Add salt to the boiling water only after the eggs are submerged, not before. Salt added early can cause uneven cooking and make the whites rubbery—wait until the water’s already hot for perfect texture.
- CHOP HERBS FINE: Use a sharp knife to mince parsley and dill into tiny pieces, almost like confetti. Big chunks look lazy and get chewy; fine herbs distribute flavor evenly and make every bite taste fresh.
Pro cooking tips for this dish
Egg Boiling Perfection
Timing is everything for eggs—boil them for exactly 9 minutes from a rolling boil to achieve firm whites and creamy yolks. I use a slotted spoon to transfer them to an ice bath for 10 minutes to stop cooking. This method prevents overcooking and keeps the yolks tender. Never peel eggs while they're hot—crack them under cool running water to make peeling effortless. 🥚
Tuna Texture Control
Use high-quality albacore tuna in water for cleaner flavor and better texture. Drain it well but save 1 tablespoon of oil from oil-packed tuna to add richness to the filling. Break up any large chunks with a fork while mixing to ensure an even, flaky texture. If your tuna is too dry, add 1 teaspoon water to keep it moist but not soggy. 🐟
Herb Freshness Matters
Fresh herbs make all the difference—parsley and dill should be finely chopped for maximum flavor. If you’re short on fresh herbs, dried parsley at half the amount works, but fresh is ideal. For extra brightness, add 1 teaspoon of lemon zest to the filling. The herbs should be evenly distributed so every bite has that vibrant pop. 🌿
Crunchy Topping Secrets
The crispy fried onions and toasted breadcrumbs are the game-changers. For extra crunch, pan-fry onions in butter instead of using store-bought. Toast the breadcrumbs in a dry pan over medium heat for 2-3 minutes until golden. Press them lightly onto the bites to ensure they stick without making the topping too heavy. 🧅
Assembly Like a Pro
Work quickly when assembling to keep the egg wedges from drying out. Use a small spoon to place 1 teaspoon of filling on each wedge, then gently press the breadcrumb mix on top. Arrange bites on a parchment-lined tray with space between them for even chilling. Cover loosely with plastic wrap and refrigerate for 30 minutes before serving. ⏰
Serving with Flair
Serve these bites on a platter with lemon wedges for a fresh finish. For a brunch twist, arrange them on a toasted baguette with a drizzle of honey mustard. For appetizers, skewer them on toothpicks with cherry tomatoes and cucumber slices. The contrast of textures and flavors makes this dish feel special every time. ✨
Nutrition facts
Frequently asked questions
Can I use oil-packed tuna instead of water-packed?
Yes, but drain it thoroughly and reserve 1 tablespoon of the oil to mix into the filling for extra richness. Oil-packed tuna is slightly more flavorful, but water-packed gives you cleaner taste control. If using oil-packed, reduce the added olive oil by 1 teaspoon to balance the fat content.
How do I prevent the breadcrumb topping from getting soggy?
Chill the assembled bites in the fridge for at least 30 minutes before serving—this helps the breadcrumbs set slightly. For extra insurance, toast the breadcrumbs until golden before adding them, and press them lightly onto the bites. If making ahead, store in an airtight container with parchment between layers.
What's the best way to serve these bites?
These versatile bites work perfectly as appetizers on skewers, brunch toppings on avocado halves, or hearty lunch sandwiches. For a restaurant-style presentation, arrange them on a platter with lemon wedges and fresh herbs. They also make great meal prep—portion into small containers for grab-and-go lunches.
Can I make this recipe without mayo?
Replace the mayo with a mix of Greek yogurt and 1 tablespoon olive oil for a lighter version. For extra creaminess, add 1 teaspoon Dijon mustard to the yogurt mixture. This keeps the texture rich while cutting back on fat. The dish will still hold together beautifully.
How long will these bites keep in the fridge?
Store them in an airtight container with parchment between layers for up to 4 days, though texture is best within 2 days. For longer storage, freeze the assembled bites (without chilling first) for up to 1 month. Thaw overnight in the fridge before serving.