
Breakfast & Brunch
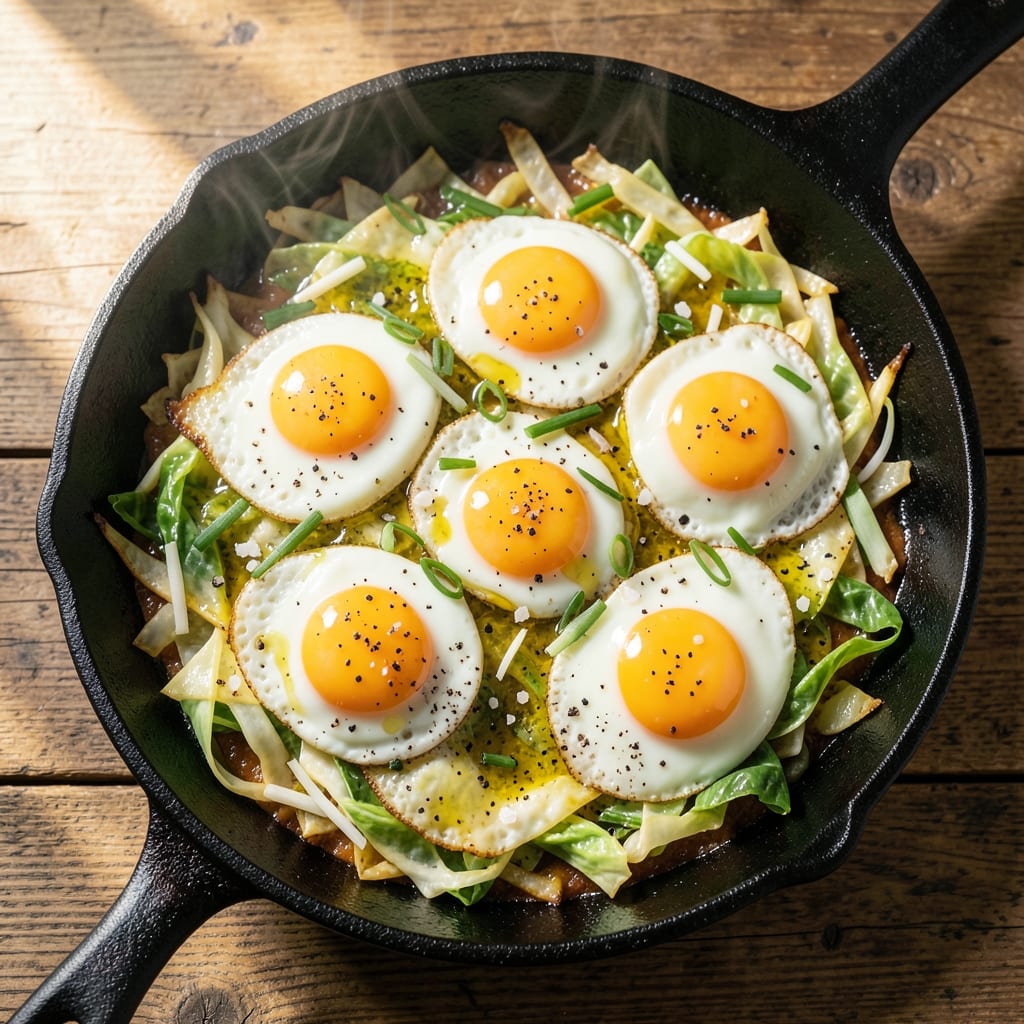
This cabbage egg fry recipe transforms humble ingredients into a restaurant-worthy breakfast with crispy cabbage and silky scrambled eggs—all cooked in one skillet. The technique is simple yet precise: thinly shredded cabbage fries up with perfect texture while eggs cook to creamy perfection, creating a dish that's both hearty and light. I developed this recipe after realizing how quickly cabbage wilts when overcooked, and the solution was high heat and quick stirring. What sets this dish apart is the balance of textures—crispy cabbage edges that stay crunchy while the eggs remain tender and moist. The key lies in prepping the cabbage properly (no soggy bits!) and cooking the eggs just until set, then folding them gently into the cabbage. This method ensures every bite delivers that satisfying contrast of crisp and creamy, with minimal cleanup. The result is a complete meal packed with protein, fiber, and flavor—ideal for weeknight breakfasts or brunch. Serve it with toasted sourdough for dipping or alongside steamed rice for a more substantial dish. The beauty of this recipe is its versatility: it works as a standalone meal or alongside other breakfast staples. For extra depth, finish with a sprinkle of red pepper flakes or fresh herbs. The dish keeps well for lunch the next day, making it perfect for meal prep. Let's get cooking!
Ingredients for cabbage egg fry
Thinly shredded cabbage and creamy eggs come together in one skillet for a restaurant-style breakfast.
| Ingredient | Amount | Notes |
|---|---|---|
| Green Cabbage 🥬 | 1 lb | Thinly shredded, core removed |
| Large Eggs 🥚 | 6 whole | Room temperature for even cooking |
| Unsalted Butter 🧈 | 2 tbsp | Full-fat for best flavor |
| Extra-Virgin Olive Oil 🫒 | 1 tbsp | For high-heat frying |
| Diamond Crystal Kosher Salt 🧂 | ½ tsp | Adjust to taste |
| Freshly Ground Black Pepper 🌶️ | ¼ tsp | Freshly cracked for best flavor |
| Red Pepper Flakes 🔥 | ¼ tsp | Optional for heat |
| Fresh Parsley 🌿 | ¼ cup | Chopped, for garnish |
| Sourdough Bread 🍞 | 4 slices | Toasted, for serving |
| Garlic Cloves 🧄 | 2 cloves | Minced, optional for extra flavor |
| Lemon Juice 🍋 | 1 tsp | Freshly squeezed, optional |
The cabbage is the star here—green cabbage holds up best to high heat and stays crisp. Look for heads that are firm and vibrant, not wilted or yellowing. Local farmers markets often have fresher options than grocery stores. If you can't find green, Napa cabbage works too, but it's more tender. Thinly shredding the cabbage is key—use a sharp knife or mandoline for even slices. The butter and olive oil combo gives you the perfect balance of richness and heat resistance for crispy edges.
No butter? Olive oil or avocado oil works just fine, but you might need an extra minute to get the cabbage crispy. Eggs too runny? Add a splash of water or milk to the skillet to steam them gently. Fresh parsley is ideal, but dried parsley at one-third the amount works in a pinch. Want extra flavor? Add the minced garlic and lemon juice at the end—it brightens everything up. The red pepper flakes can be omitted if you prefer no heat, but they add a nice kick that pairs perfectly with the eggs.
This dish reheats beautifully—just warm it through in a skillet with a splash of water. Keeps for 2 days in the fridge, but the texture is best the first day. For meal prep, store the cabbage and eggs separately and combine when ready to eat. The toasted sourdough stays fresh for 3 days if wrapped tightly. If you make extra, freeze portions without the bread—just reheat and toast fresh slices when serving.
Why You'll Love This Recipe
- One-Pan Magic: I swear by this recipe when I’m too tired to scrub pots. Shred the cabbage, crack eggs into the same pan, and let the butter and olive oil work their magic—no flipping, no fuss. The cabbage softens while the eggs cook right in the rendered fat, so you’re basically done before you realize it.
- Buttery Crispy Edge: That first bite where the cabbage meets the egg? It’s ridiculously good. The butter browns the edges of the cabbage just enough for a little crunch, while the eggs stay creamy—no rubbery yolks here. Honestly, I’ll take this over a fancy brunch any day.
- Lunchbox Hero: Between us, this is my go-to for meal prep. Pack it cold or reheat it gently, and it’s still solid. My kids grab it for school lunches, and my husband sneaks it straight from the fridge at work. (Yes, even on a Tuesday night.)
- Pantry Staple Power: Cabbage and eggs? Cheaper than takeout, cheaper than groceries for two. I buy a whole head of cabbage and freeze what I don’t use—no waste, no stress. And since it’s just five ingredients, I never overbuy or let anything go bad. Budget-friendly doesn’t get much better than this.
Step-by-step instructions for crispy cabbage and silky eggs in one skillet
Crispy cabbage meets perfectly cooked eggs in this one-pan wonder.
Prepare the Cabbage for Perfect Crispiness
Start by removing the core from the 1 lb green cabbage and thinly shred it into ¼-inch wide strips. You want even thickness so the cabbage cooks uniformly. Transfer the shredded cabbage to a large bowl and toss it with 0.5 tsp Diamond Crystal kosher salt and 0.25 tsp freshly ground black pepper. Let it sit for 5 minutes—this draws out moisture, ensuring crispy edges when cooked.
If using the 2 cloves minced garlic and 0.25 tsp red pepper flakes, add them to the cabbage now. The garlic will infuse flavor while the red pepper flakes add subtle heat. Give everything a final toss to distribute the seasonings evenly. This step is crucial for developing the cabbage's texture and flavor foundation.
Cook the Cabbage Until Tender-Crisp
Heat a large skillet over medium-high heat and add 1 tbsp extra-virgin olive oil and 2 tbsp unsalted butter. Let the butter melt completely and foam before adding the cabbage. Spread the cabbage evenly in the pan—don't overcrowd it, or the cabbage will steam instead of crisp.
Cook the cabbage for 8-10 minutes, stirring occasionally, until it becomes tender but still holds its shape with slightly crisp edges. You're aiming for a balance—too soft and it loses texture; too firm and it won't be tender enough. The cabbage should smell fragrant and look vibrant green with golden edges. If it releases too much liquid, reduce heat slightly to evaporate the moisture.
Create Wells for Silky Eggs
Once the cabbage is cooked, use a spatula to create 4 small wells in the pan, spacing them evenly. These wells will hold the eggs and allow them to cook gently in the residual heat. Reduce the heat to medium-low—this prevents the eggs from scrambling while they cook through.
Crack 6 whole large eggs (room temperature) into the wells, one at a time. The eggs should settle into the cabbage without spreading too much. If they look too runny, wait 30 seconds for the pan to cool slightly before adding the next egg. This step ensures perfectly set eggs with creamy yolks.
Cook the Eggs to Perfect Doneness
Cover the skillet with a lid and cook the eggs for 4-5 minutes until the whites are fully set but the yolks remain slightly runny. You want that classic silky texture—overcooking turns yolks rubbery. Check the eggs after 3 minutes and adjust the heat if needed; medium-low is ideal for gentle cooking.
Once the eggs are done, remove the skillet from heat and let everything rest for 1 minute. This allows the residual heat to finish cooking the eggs slightly without overdoing it. The cabbage should still be warm and crisp, and the eggs should hold their shape when lifted with a spatula.
Finish and Serve with Fresh Herbs
Drizzle the eggs with 1 tsp freshly squeezed lemon juice and sprinkle with 0.25 cup chopped fresh parsley. The lemon brightens the dish, while the parsley adds freshness. Taste and adjust seasoning with additional Diamond Crystal kosher salt or black pepper if needed.
Serve immediately with 4 slices toasted sourdough bread on the side. The crispy cabbage and silky eggs pair perfectly with the bread's crunch. Each bite delivers a contrast of textures—crispy cabbage, creamy eggs, and toasty bread—making this a satisfying one-skillet meal.
Pro Tips For Making Cabbage Egg Fry
- COOK CABBAGE IN BATCHES: Green cabbage releases a ton of water when cooked—if you toss the whole head in at once, you’ll end up with sad, soggy leaves instead of crisp-tender ones. Cut it into quarters, then slice each quarter separately and cook in 2-3 batches. The pan stays hot, the cabbage browns properly, and you avoid the dreaded "boil-in-its-own-juice" texture.
- CRACK EGGS INTO COLD WATER: I used to crack eggs straight into the pan, and half the time they’d splatter or stick. Now I whisk them in a bowl first, then pour into a shallow dish of cold water. The eggs slide in smoothly, and you can spot any weird yolks or blood spots before they hit the heat. (Yes, even if you’re impatient like me.)
- USE BUTTER + OIL TOGETHER: Butter alone burns fast, olive oil alone stays too mild. Heat 1 tablespoon olive oil first, then add 1 tablespoon butter—it melts into a golden, flavor-packed base that won’t scorch. The olive oil handles the heat, the butter adds richness, and your cabbage gets that nutty, caramelized edge.
- SALT THE CABBAGE BEFORE COOKING: Toss sliced cabbage with ½ teaspoon salt and let it sit for 10 minutes before cooking. This draws out moisture, so it crisps up faster and absorbs less oil. Skip this, and you’ll end up with a greasy, limp pile instead of the perfect textural contrast with those creamy eggs.
Pro cooking tips for perfect results
Skillet Selection
Your choice of pan makes all the difference here. I swear by a 12-inch cast-iron skillet like the Lodge Pre-Seasoned—it retains heat beautifully and creates those perfect crispy cabbage edges. If you don’t have cast iron, a heavy stainless steel skillet (like All-Clad) works too, but preheat it for 2-3 minutes longer to compensate for heat loss. Avoid nonstick—it won’t get hot enough for proper browning. 🔥
Egg Temperature Hack
Room-temperature eggs cook more evenly, but I’ve found an even better trick: whisk them first. Crack the eggs into a bowl, add a pinch of salt, and whisk vigorously for 10 seconds. This breaks up the proteins slightly, creating eggs that are silky rather than grainy. Pro tip: Use a wire whisk—it creates more air than a fork. If your eggs are cold, let them sit in the fridge for 10 minutes before whisking. 🥚
Cabbage Prep Shortcut
Thinly shredding cabbage by hand takes time, but I’ve perfected a mandoline method that saves 10 minutes. Use a Bentgo mandoline with the thin julienne blade (set to ¼-inch). Work in batches, holding the cabbage with a damp towel to prevent slipping. For extra speed, remove the core and slice the cabbage in half lengthwise first—this makes it easier to feed through the mandoline. 🥬
Heat Control Secrets
The two-stage heat approach is non-negotiable for perfect texture. Start with medium-high heat for the cabbage to blister and crisp, then immediately reduce to medium-low when adding eggs. Too much heat scrambles the eggs; too little makes them rubbery. I use a kitchen torch to test the pan’s readiness—if it takes 2 seconds for the flame to turn blue, the heat is perfect. 💡
Resting Time Matters
Skipping the 1-minute rest after cooking is a rookie mistake. This final step lets the residual heat finish cooking the eggs gently while keeping the cabbage crisp. I cover the skillet loosely with a lid during this time to trap heat. If you’re serving a crowd, rest the dish for 2 minutes—it makes all the difference in texture and presentation. ✨
Texture Rescue
If your cabbage turns soggy, don’t panic. Remove the skillet from heat, add 1 tbsp unsalted butter, and stir vigorously for 30 seconds to re-crisp the edges. For eggs that overcook, sprinkle 1 tsp cold water over them and cover for 1 minute—the steam plumps them back up. These tricks save every dish, trust me. 💪
Nutrition facts
Frequently asked questions
Can I use frozen cabbage instead of fresh?
Fresh cabbage is ideal for that perfect crispy texture, but you can use frozen in a pinch. Thaw and drain it completely first, then pat dry with paper towels. The key is to cook it 1-2 minutes longer than fresh to evaporate all moisture. For best results, add it to the pan when the butter is foaming but before it fully melts.
How do I make this vegetarian-friendly without eggs?
Swap the eggs for crispy tofu cubes or chickpea flour fritters to keep it vegetarian. For tofu, press and cube firm tofu, then pan-fry until golden. For fritters, mix ½ cup chickpea flour with water, form patties, and cook until crispy. Both options add protein while maintaining the dish's hearty texture.
Why did my cabbage turn mushy instead of crispy?
Overcrowding the pan or using too much liquid (like wet cabbage) causes sogginess. Always cook cabbage in a single layer and stir frequently. If using pre-shredded bagged cabbage, rinse and spin dry thoroughly. For extra insurance, add 1 extra tablespoon of butter at the end to re-crisp the edges.
Can I cook this ahead of time for meal prep?
Yes, but store components separately to maintain texture. Cook the cabbage fully, then refrigerate it in an airtight container for 2 days. Prepare the eggs fresh when ready to eat—simply reheat the cabbage in a dry pan for 2 minutes and cook the eggs in their wells. The eggs are best made fresh to keep them silky.
What's the best way to reheat leftovers?
For best results, reheat in the same skillet over medium heat with 1 tablespoon butter for 3-4 minutes. Add a splash of water to steam the cabbage gently and prevent drying. If microwaving, cover with a damp paper towel and heat for 45 seconds—this keeps the cabbage from becoming rubbery.