
Main Courses
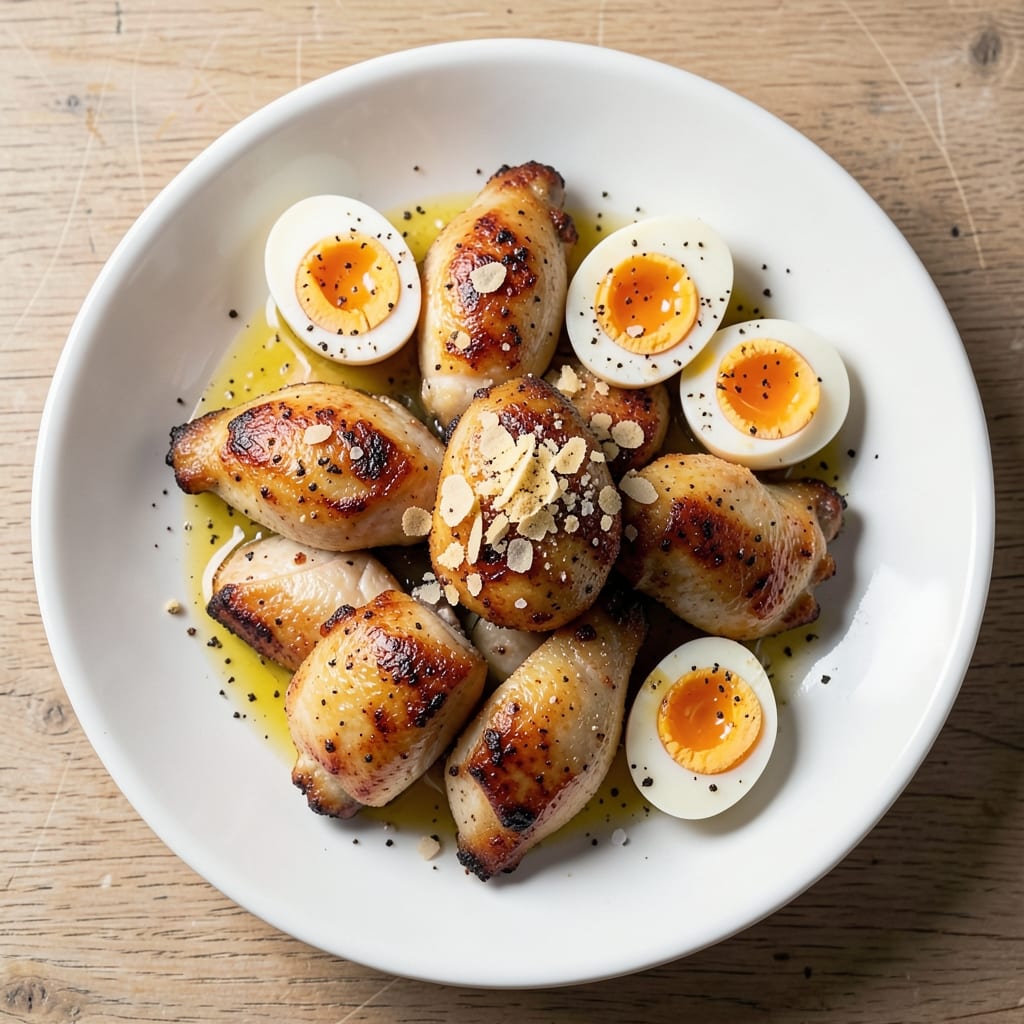
Crispy-skinned chicken and perfectly boiled eggs create a protein-packed dish that’s surprisingly simple yet restaurant-worthy. The secret lies in high-heat searing for the chicken—achieving that golden, shatteringly crisp exterior while keeping the meat juicy inside—paired with eggs boiled just enough to stay tender yet firm. This balance transforms a basic protein combo into a meal that feels special without requiring hours in the kitchen.
What sets this recipe apart is the harmony between textures: crispy chicken with a crackling crust contrasts beautifully with eggs that stay creamy at the center. We’ll use a quick marinade to infuse flavor into the chicken while keeping prep minimal—no complicated techniques, just precise timing. The result is a dish that’s ready in under 30 minutes, perfect for weeknight dinners or meal prep.
Serve these protein-packed bites over a bed of fluffy rice, tucked into lettuce wraps, or alongside roasted vegetables for a complete meal. The crispy chicken holds up well to bold sauces like spicy mayo or tangy chimichurri, while the eggs add richness to every bite. Garnish with fresh herbs or sesame seeds for a touch of elegance that makes this dish feel like a chef’s creation.
This recipe proves you don’t need complicated ingredients to make something impressive. With just a few pantry staples and the right techniques, you’ll have a dish that’s foolproof, satisfying, and ready to impress anyone at your table. Let’s get cooking!
Ingredients for chicken and boiled egg
Crispy chicken and creamy eggs need just these 13 ingredients for restaurant-quality bites.
| Ingredient | Amount | Notes |
|---|---|---|
| Boneless, Skin-On Chicken Thighs 🍗 | 1 ½ lb | Cut into even 1-inch pieces |
| Large Eggs 🥚 | 8 whole | Room temperature for even cooking |
| Cornstarch 🌾 | ½ cup | For crispy chicken coating |
| Diamond Crystal Kosher Salt 🧂 | 1 ½ tbsp | For marinade and seasoning |
| Ground Black Pepper 🌶️ | 1 tsp | Freshly cracked for best flavor |
| Garlic Powder 🧄 | 1 tsp | For marinade depth |
| Smoked Paprika 🌶️ | ½ tsp | For subtle smokiness |
| Extra-Virgin Olive Oil 🫒 | ¼ cup | High smoke point for searing |
| Fresh Lemon Juice 🍋 | 2 tbsp | Brightens the marinade |
| White Vinegar 💧 | 1 tbsp | For egg boiling clarity |
| Ice Cubes ❄️ | 2 cups | For egg shocking |
| Sesame Seeds 🌾 | 1 tbsp | For garnish (optional) |
| Fresh Cilantro 🌿 | ¼ cup | Chopped for garnish |
The chicken thighs are non-negotiable here—the skin-on variety gives you that shatteringly crisp crust while keeping the meat juicy. Grab bone-in, skin-on thighs from the meat counter (they're cheaper than breasts and more flavorful). If your store doesn't carry them, Costco or Whole Foods always have them in stock. For the eggs, room temperature is key—pull them out 30 minutes before cooking. The cornstarch is what creates that golden, crunchy exterior when paired with high-heat searing. I always buy Diamond Crystal kosher salt because it dissolves better than table salt and gives more even seasoning.
No cornstarch? All-purpose flour or arrowroot powder works in a pinch (use the same amount). Running short on fresh herbs? Dried cilantro or parsley at half the amount gets you close. The eggs can be boiled ahead and stored in the fridge for up to 2 weeks—just shock them in ice water again before serving. For the chicken marinade, any citrus juice works if you're out of lemon, but lemon's the brightest. The smoked paprika adds depth without overpowering—skip it if you're sensitive to smoky flavors. And if you're making this for a crowd, double the chicken and eggs—they disappear fast.
Store the cooked chicken in an airtight container with a paper towel on top to keep it crispy for 3 days. The boiled eggs last up to 2 weeks in the fridge, but they're best within the first week. For meal prep, I like to portion the chicken and eggs separately—toss the chicken with a little extra olive oil to keep it from drying out. The sesame seeds and fresh herbs are best added right before serving, but if you're prepping ahead, store them separately and sprinkle just before eating. This dish reheats beautifully—just warm the chicken in a skillet for 2-3 minutes until crispy again.
Why You'll Love This Recipe
- Fewer Ingredients, Bigger Payoff: I swear by this combo—just chicken thighs, eggs, and a pinch of salt. That’s it. No fancy pantry raids, no last-minute grocery runs. The skin-on thighs crisp up while the eggs stay perfectly firm, and honestly? The simplicity makes it feel like a win every time.
- Crispy Skin, Creamy Center: The magic happens with the cornstarch and kosher salt—those thighs get shatteringly crispy on the outside while staying juicy inside. Pair that with the buttery, unbroken yolks of boiled eggs, and you’ve got a flavor balance that’s hard to beat. (Yes, even on a Tuesday night.)
- Lunchbox or Dinner Plate: Between us, this recipe works for everything. Toss the chicken and sliced eggs into a wrap for a grab-and-go lunch, or serve it over rice for a full dinner. My college-aged kid takes it to campus—no reheating needed. It’s that versatile.
- Budget-Friendly Leftovers: Chicken thighs and eggs are cheap, but they stretch into so many meals. Double the batch, store the leftovers, and you’ve got protein-packed lunches for days. I’ll be real: this is my go-to for feeding the family without breaking the bank.
Step-by-step instructions for crispy-skinned protein-packed chicken and eggs
Here's how to transform simple ingredients into restaurant-worthy bites with perfect texture.
Marinate and Prep the Chicken Thighs
Cut the 1.5 lb boneless, skin-on chicken thighs into even 1-inch pieces, keeping the skin intact. In a large bowl, whisk together 2 tbsp fresh lemon juice, 1 tbsp white vinegar, 1.5 tbsp diamond crystal kosher salt, 1 tsp garlic powder, and 0.5 tsp smoked paprika until fully dissolved. Add the chicken pieces and toss gently to coat evenly. Let the mixture marinate for at least 30 minutes in the refrigerator—this ensures tender meat and maximizes flavor penetration.
Here's the thing—don't skip the marinade time. The acidity from the lemon and vinegar breaks down the proteins slightly, while the salt and spices create that perfect balance of savory and aromatic depth. The skin will stay crispy while the meat remains juicy, thanks to this prep work.
Create the Crispy Cornstarch Coating
In a separate shallow dish, combine 0.5 cup cornstarch with 1 tsp ground black pepper. This is your secret weapon for that irresistible crunch. After marinating, remove the chicken pieces and pat them dry with paper towels—excess moisture prevents the cornstarch from adhering properly. Working in batches, press each piece into the cornstarch mixture, coating all sides thoroughly. Let them sit for 5 minutes while you prepare the eggs.
Don't rush this step. The cornstarch needs time to fully adhere to the chicken, creating that perfect golden crust when cooked. If you're impatient, you'll end up with uneven coverage and less crispiness. Trust me, those 5 minutes make all the difference.
Boil the Perfect Eggs
Place the 8 whole large eggs into a saucepan and cover them with 2 cups ice cubes and enough cold water to submerge them completely. Bring to a boil over medium-high heat, then immediately remove from heat and cover with a lid. Let them sit for exactly 10 minutes—this timing ensures perfectly set yolks with no grayish ring. After 10 minutes, drain the hot water and transfer the eggs to a bowl filled with 2 cups ice cubes and cold water for 15 minutes to shock them. This stops the cooking process instantly, keeping the yolks creamy.
Real talk: The ice water bath is non-negotiable. Without it, your eggs will continue cooking and develop that unappealing rubbery texture. The shock also makes peeling them effortless later. I always use a timer for both the boiling and shocking stages—precision matters here.
Pan-Fry the Chicken to Crispy Perfection
Heat 0.25 cup extra-virgin olive oil in a large skillet over medium-high heat until shimmering. Add the cornstarch-coated chicken pieces in a single layer, leaving space between them. Cook undisturbed for 3-4 minutes until the skin becomes deep golden brown and crispy—this is your signal to flip. Cook another 3-4 minutes until the internal temperature reaches 165°F and the chicken is cooked through.
Watch the heat carefully here. If it's too high, the cornstarch will burn before the chicken cooks through. You want that beautiful golden crust without any bitterness. Once done, transfer the chicken to a paper towel-lined plate to drain excess oil. The residual heat will keep them warm while you finish.
Assemble and Garnish
Peel the shocked eggs and halve them lengthwise. Arrange the crispy chicken pieces alongside the egg halves on a serving platter. Drizzle any remaining pan juices over the top for extra flavor, then sprinkle with 1 tbsp sesame seeds and 0.25 cup chopped fresh cilantro. Serve immediately while the chicken is still crispy and the eggs are at room temperature.
This is the moment that matters: The contrast between the crispy chicken skin, creamy egg yolks, and fresh garnishes creates a perfect bite. The sesame seeds add a nutty crunch, while the cilantro brings brightness to cut through the richness. Don't skip the garnish—it elevates the dish from good to exceptional.
Pro Tips For Making Chicken And Boiled Egg
- CRISP THE SKIN: Use a paper towel to pat the chicken thighs bone-dry—I mean really dry—before seasoning. The skin won’t brown properly if it’s damp, and you’ll end up with sad, limp skin instead of that golden, shatterable crust. Trust me, I’ve made this mistake at least five times.
- SALT THE EGGS FIRST: Toss the eggs in a light cornstarch coating (about 1/4 teaspoon per egg) before boiling, not after. This keeps them from turning gummy when they hit the water, and the starch helps them hold together when you slice them later. I used to skip this, and the eggs always ended up mushy—now they’re perfect every time.
- DON’T OVERCROWD THE PAN: If you’re pan-frying the thighs, leave space between them—no more than two at a time, skin-side down. I learned this the hard way when I jammed four in there and ended up with steamed chicken instead of crispy. A little patience here means the difference between a good dish and a greasy mess.
- REST THE THIGHS: After frying, transfer the chicken to a wire rack (or even a clean towel) and let it sit for at least 5 minutes. This lets the juices redistribute—if you slice into it too soon, you’ll end up with dry, stringy meat. I know, I know, you’re eager to eat it, but this is the thing that makes the dish actually taste good.
Storing and reheating this recipe
Chicken Storage Secrets
Store cooked chicken in an airtight container with a paper towel on top to absorb excess moisture—this keeps the skin crispy for up to 3 days in the fridge. I like using glass Pyrex containers because they reheat evenly in the microwave. For longer storage, freeze the chicken for up to 3 months—just wrap each piece individually in parchment paper before placing in a freezer bag. 💫
Egg Preservation Tips
Boiled eggs last up to 2 weeks in the fridge when stored in their shells, but they're best within the first week for optimal texture. Keep them in the coldest part of your fridge (usually the back shelf) to maintain freshness. For meal prep, I peel and store them in a sealed container with a splash of water to prevent drying out. Never store peeled eggs in water—they'll absorb flavors and become waterlogged.
Reheating Crispy Chicken
To revive that crispy texture, reheat chicken in a skillet over medium heat for 2-3 minutes until golden again. Add 1 tsp olive oil to the pan to help restore crispiness. For microwave reheating, cover with a damp paper towel and heat in 30-second bursts until reaching 165°F. Avoid steaming the chicken—this makes it soggy and ruins the texture. 🔥
Egg Reheating Hacks
Reheat eggs gently in the microwave for 15-20 seconds on 50% power to maintain their creamy texture. For a stovetop method, warm in a small pan with 1 tbsp water over low heat for 1-2 minutes. Never overheat—eggs dry out quickly. If reheating for a crowd, I like to keep them at room temperature in a thermos for up to 2 hours before serving.
Freezer-Friendly Prep
Portion chicken and eggs separately before freezing for easy reheating. Store chicken pieces in a single layer on a tray before transferring to a freezer bag to prevent sticking. For eggs, freeze them unpeeled in their shells—they'll be easier to peel after thawing. Label everything with dates to track freshness. Thaw frozen chicken in the fridge overnight for best results. ❄️
Make-Ahead Serving Ideas
Prep the chicken and eggs separately for up to 3 days ahead—just reheat before serving. For a quick assembly, store garnishes (sesame seeds and cilantro) in small containers and add fresh when plating. If serving cold, chill the chicken and eggs together for 1 hour before garnishing. This dish reheats beautifully, making it perfect for meal prep lunches or weeknight dinners with minimal effort.
Nutrition facts
Frequently asked questions
Why use cornstarch instead of flour for the chicken? Cornstarch creates a lighter, crispier crust that stays crunchy longer than flour. The fine texture clings better to the chicken skin, creating that perfect golden-brown finish without getting gummy. For extra crispiness,
Can I substitute boneless chicken thighs for breasts?
You can, but the skin will be thinner and less flavorful. Chicken breasts cook faster and are leaner, so they won’t hold up as well to the crispy coating. If using breasts, cut them into ½-inch pieces and reduce cooking time to 2-3 minutes per side to avoid drying out.
How do I prevent my boiled eggs from turning gray?
Grayish yolks happen when eggs overcook. Use the 10-minute boil + 15-minute ice bath method exactly—no longer! Also, add 1 tbsp vinegar to the boiling water to help preserve the yolk color. Fresh eggs (under 1 week old) are less likely to develop gray rings.
What’s the best way to serve this dish for a crowd?
Double the recipe and serve family-style! Arrange the chicken and eggs on a large platter with sides like steamed rice or a fresh cucumber salad. Offer small bowls of sauces (spicy mayo, chimichurri, or soy-ginger) for dipping. Garnish with extra sesame seeds and cilantro at the table.
Can I make this dish ahead of time?
Cook the chicken and boil the eggs 1 day ahead. Store them separately in airtight containers—keep the chicken crispy by reheating it in a skillet for 2-3 minutes before serving. Reheat eggs gently in the microwave for 15-20 seconds on low power to maintain creaminess.