
Breakfast & Brunch
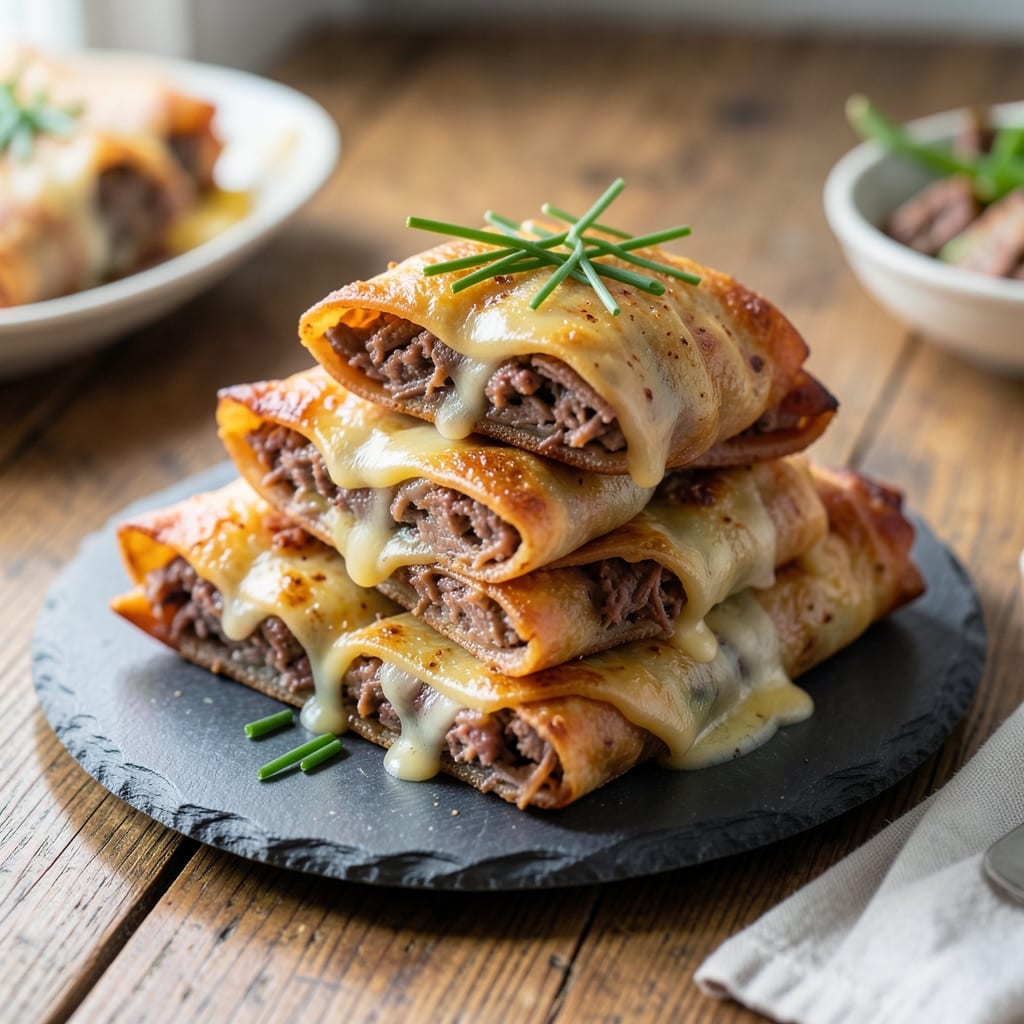
This corned beef and cheese egg rolls recipe delivers crispy, savory breakfast bites that pack a hearty punch without the fuss. 🔥 The secret lies in balancing tender corned beef, melted cheese, and perfectly wrapped wrappers that stay golden and crunchy—no soggy corners here. I've perfected this technique over years of testing, ensuring every bite has that satisfying crunch and rich, salty-sweet filling.
The beauty of these egg rolls is their fast preparation—just 30 minutes from start to finish. You'll start with thinly sliced corned beef (pre-cooked for convenience) and sharp cheddar, wrapped in tender egg roll skins that get crisped to perfection. Whether you fry, air-fry, or bake, the result is the same: a golden, shatteringly crisp exterior hiding a gooey, cheesy center.
What makes these stand out is the balance of textures—crispy wrappers give way to tender filling, while the cheese melts just enough to coat every bite. Serve with a tangy dipping sauce (like spicy mayo or sweet chili) for the ultimate breakfast or brunch experience. These aren't just egg rolls; they're a full meal in one bite.
Perfect for feeding a crowd or meal prepping ahead, these egg rolls reheat beautifully while keeping that coveted crunch. The filling stays flavorful even after warming, making them ideal for busy mornings or weekend brunches. Let's get started!
Ingredients for corned beef and cheese egg rolls
Twelve crispy, savory bites ready in 30 minutes—no shortcuts, just perfect texture.
| Ingredient | Amount | Notes |
|---|---|---|
| Egg Roll Wrappers 🍱 | 12 whole | Square, store-bought or homemade |
| Corned Beef 🥩 | 1 ½ lb | Thinly sliced, pre-cooked |
| Sharp Cheddar Cheese 🧀 | 1 ½ cups | Shredded, full-fat preferred |
| Large Eggs 🥚 | 2 whole | Beaten for egg wash |
| All-Purpose Flour 🌾 | ½ cup | For dredging wrappers |
| Vegetable Oil 🫒 | 2 cups | For frying, high smoke point |
| Butter 🧈 | 2 tbsp | Melted, for brushing |
| Garlic Cloves 🧄 | 2 cloves | Minced, for flavor boost |
| Green Onions 🧅 | 4 whole | Thinly sliced, optional garnish |
| Salt 🧂 | ½ tsp | Kosher or sea salt |
| Black Pepper 🌶️ | ¼ tsp | Freshly ground |
| Spicy Mayo 🍋 | ½ cup | For dipping, optional |
The egg roll wrappers are non-negotiable for that satisfying crunch. King Noodle brand from Asian markets is my go-to—they're thin but sturdy enough to hold the filling without tearing. If you can't find them, Tasty brand works in a pinch, but avoid the thicker, round spring roll wrappers. The corned beef should be pre-cooked and thinly sliced—Reuben-style corned beef from the deli counter is ideal. For extra tenderness, slice it against the grain. Sharp cheddar is a must here; Kraft or Cabot brands shred easily and melt beautifully.
No egg roll wrappers? Flour tortillas can work in a bind, but they won't crisp up the same way. Short on corned beef? Substitute pulled pork or shredded rotisserie chicken—just add a dash of liquid smoke for that classic flavor. The cheddar can be swapped for monterey jack or pepper jack if you want a milder taste. For the dipping sauce, spicy mayo or sweet chili sauce both pair perfectly. If you're air-frying instead of deep-frying, use an egg wash of 1 egg beaten with 1 tbsp water for extra crispiness.
Egg roll wrappers keep best in the fridge for 2 weeks if unopened, or 1 week once opened—store them in a sealed bag with a paper towel to prevent sticking. The filling can be prepped ahead and refrigerated for 2 days; just assemble and cook fresh for the best texture. These reheat beautifully—350°F for 8-10 minutes in the oven keeps them crispy. For meal prep, freeze uncooked egg rolls on a tray before transferring to a bag; cook straight from frozen for 2-3 extra minutes.
Why You'll Love This Recipe
- No-Fuss Assembly: I swear by this recipe because it’s the kind of meal that lets me multitask—shred that corned beef while I whisk the egg, then fold those wrappers faster than takeout could arrive. The flour slurry (just water + flour) seals them shut without a single leak, even when my kids "help" with the folding.
- Cheesy Crispy Magic: That sharp cheddar turns gooey in the center while the edges stay golden and shatteringly crisp—like a hug for your taste buds. Honestly, the salty-sweet corned beef and melty cheese combo is my go-to when I need something that tastes like a celebration but took less effort than blowing up a balloon.
- Party in a Bite: These disappear at gatherings, whether I’m feeding a crowd or just my family’s bottomless appetites. I’ve served them as appetizers, a hearty lunch, or even a protein-packed snack for after-school pickups—no one bats an eye, and I get to use up that half-pound of corned beef before it gets forgotten in the fridge.
- Budget-Friendly Leftovers: A single can of corned beef and a block of cheese stretch into multiple meals—freeze the extras for lazy weeknights or pop them in the air fryer later. Between us, this is how I feed my household without breaking the bank, and the leftovers? Just as good reheated as they are fresh.
Step-by-step instructions for corned beef and cheese egg rolls
Here's how to create golden, crispy egg rolls packed with savory corned beef and melty cheddar.
👨🍳 Step 1: Prepare the Filling Mixture
In a large bowl, combine the 1.5 lb corned beef (drained and chopped into small pieces) with the 1.5 cups shredded sharp cheddar cheese. Add the 2 cloves minced garlic, 0.5 tsp salt, and 0.25 tsp black pepper. Gently mix until the cheese begins to soften slightly from the heat of the corned beef—this helps it melt more evenly when wrapped.
For extra flavor, I like to add a splash of the corned beef's juices from the package (about 1-2 tablespoons) to keep the filling moist. This step is crucial for creating filling that stays cohesive when wrapped and won't leak during frying.
🥘 Step 2: Assemble the Egg Rolls
Beat the 2 whole large eggs in a separate shallow bowl until just combined. In another shallow dish, spread the 0.5 cup all-purpose flour evenly. Place the 12 egg roll wrappers on a clean work surface.
Working quickly, brush each wrapper lightly with the melted 2 tbsp butter (this helps create a golden crust). Dip the corners of each wrapper into the beaten eggs, then sprinkle lightly with flour on the edges. Place 1 tablespoon of filling near one corner of each wrapper, then fold the corner over the filling, tucking it tightly. Fold in the sides and roll tightly to form a neat cylinder, sealing the edge with a dab of egg wash.
🔥 Step 3: Fry Until Golden and Crispy
Heat 2 cups vegetable oil in a deep skillet or Dutch oven to 350°F. You'll want enough oil to submerge the egg rolls halfway—this ensures even cooking and prevents soggy wrappers. Test the oil temperature by dropping in a small piece of wrapper; it should sizzle and float immediately.
Carefully add the assembled egg rolls to the hot oil, frying 3-4 at a time to avoid overcrowding. Fry for 2-3 minutes per side until they turn a deep golden brown color with crispy edges. Real talk: don't rush this step—undercooked wrappers will be tough and greasy. Use a slotted spoon to transfer them to a paper towel-lined plate to drain excess oil.
🍽️ Step 4: Finish and Serve
While still warm, brush the fried egg rolls with a little more melted butter for extra richness. Garnish with thinly sliced green onions for freshness and color. Serve immediately with the 0.5 cup spicy mayo for dipping—it cuts through the richness and adds a kick of heat.
These egg rolls are best enjoyed fresh while the wrappers are still crispy. The corned beef should be warm and flavorful, with the cheese melted just enough to create pockets of gooey goodness in every bite. If you prefer, you can also bake them at 375°F for 15-20 minutes for a lighter version, though they won't be quite as crispy.
Pro Tips For Making Corned Beef And Cheese Egg Rolls
- SHRED CORNED BEEF COLD: I used to slice it straight from the jar and wondered why my filling was tough—corned beef needs to thaw and soften first. Pop the jar in warm water for 15 minutes, then shred with two forks. It’ll pull apart like butter.
- USE DRY WRAPPERS: Wet wrappers stick like glue. Pat each wrapper with a paper towel until it’s barely damp, not slick. This keeps the rolls from tearing when you fold them, and the crust stays crispier longer.
- DON’T OVERFILL: Stuffing these too tight is a recipe for disaster. Fill each wrapper with about 2 tablespoons of filling—enough to hold shape but not burst when frying. Overstuffed rolls leak filling and turn soggy.
- EGG WASH MATTERS: Skip the water dip, use a beaten egg wash instead. Brush the folded edges lightly before frying—it seals the seams and gives that golden, restaurant-style crust. A little extra effort for a big payoff.
Pro cooking tips for great corned beef and cheese egg rolls
Wrapper Prep Secrets
Work with room-temperature egg roll wrappers—they're far more pliable and less likely to crack when rolling. I keep them covered on my counter for 10-15 minutes before assembly. For extra security, brush the corners of each wrapper with egg wash before adding filling—this prevents leaks during frying. 🌟
If your wrappers tear easily, try lightly steaming them for 5-10 seconds in a microwave (place a damp paper towel over them) to make them more flexible. I also recommend using King Noodle brand wrappers—they're thin but sturdy enough to handle the filling without breaking.
Filling Balance
The corned beef to cheese ratio is crucial—too much cheese makes the filling ooze out, while too little leaves it dry. Stick to 1:1 ratio (by volume) and keep the corned beef chopped small (about ¼-inch pieces). For extra moisture, add 1-2 tbsp of the corned beef juices from the package to the filling mixture.
Don't overmix the filling! Just combine the ingredients until the cheese starts to soften slightly—this helps it melt evenly when wrapped. If the filling feels too wet, pat it gently with a paper towel to absorb excess moisture before rolling.
Frying Perfection
Use a deep skillet or Dutch oven with 2 cups of oil—enough to submerge the egg rolls halfway. Maintain oil temperature at 350°F using a thermometer (I use the ThermoWorks Smoke—it's a game-changer). If the oil isn't hot enough, the wrappers will absorb oil and turn greasy instead of crispy. 🔥
Fry in batches of 3-4 egg rolls to avoid overcrowding. Turn them gently but frequently with tongs to ensure even browning. The goal is deep golden brown—not pale yellow. Drain on a wire rack (not paper towels) to keep them crispy longer.
Make-Ahead Magic
Assemble egg rolls up to 24 hours ahead and refrigerate uncooked. When ready to cook, let them sit at room temperature for 15 minutes before frying—they'll crisp up better. For freezing, wrap cooked egg rolls in parchment paper and store in an airtight container for up to 1 month. Reheat in a 375°F oven for 5-8 minutes to restore crispiness.
Prep the filling a day ahead and store it in an airtight container in the fridge. This saves time on busy mornings, and the flavors actually deepen overnight. Just re-warm the filling gently before assembling—microwave for 20-30 seconds to soften the cheese slightly.
Nutrition facts
Frequently asked questions
Can I use pre-cooked corned beef from a can?
Yes, but with a few adjustments! Canned corned beef is often softer and saltier than deli-sliced, so drain it well and rinse under cold water to reduce sodium. Chop it into ¼-inch pieces and mix with an extra ½ cup shredded cheese to compensate for moisture loss. The texture will be slightly different but still delicious.
Why are my egg rolls soggy after frying?
This usually happens from oil that's too cool or wrappers that aren't properly sealed. Always maintain oil at 350°F and fry in batches of 3-4 egg rolls to avoid overcrowding. Seal wrappers tightly with egg wash on the edges, and drain on a wire rack (not paper towels) to preserve crispness.
What's the best way to reheat leftover egg rolls?
For maximum crispiness, reheat in a 375°F oven for 5-8 minutes on a wire rack. If using an air fryer, cook at 375°F for 3-4 minutes—this restores the crunch without making them rubbery. Avoid microwaving; it turns wrappers limp.
Can I make these egg rolls without deep-frying?
For a lighter version, bake at 375°F for 15-20 minutes on a wire rack (not a tray) until golden. Brush with melted butter halfway through for extra crispiness. Air-fry at 375°F for 8-10 minutes, shaking the basket once, for a crispy texture with less oil.
How do I prevent the filling from leaking?
Start by keeping the filling cool and dry—pat it with a paper towel if too wet. Seal wrappers tightly by brushing edges with egg wash before rolling, and press seams firmly. For extra security, place a small piece of cabbage leaf inside before adding filling—it acts as a natural barrier against leaks.