
Desserts
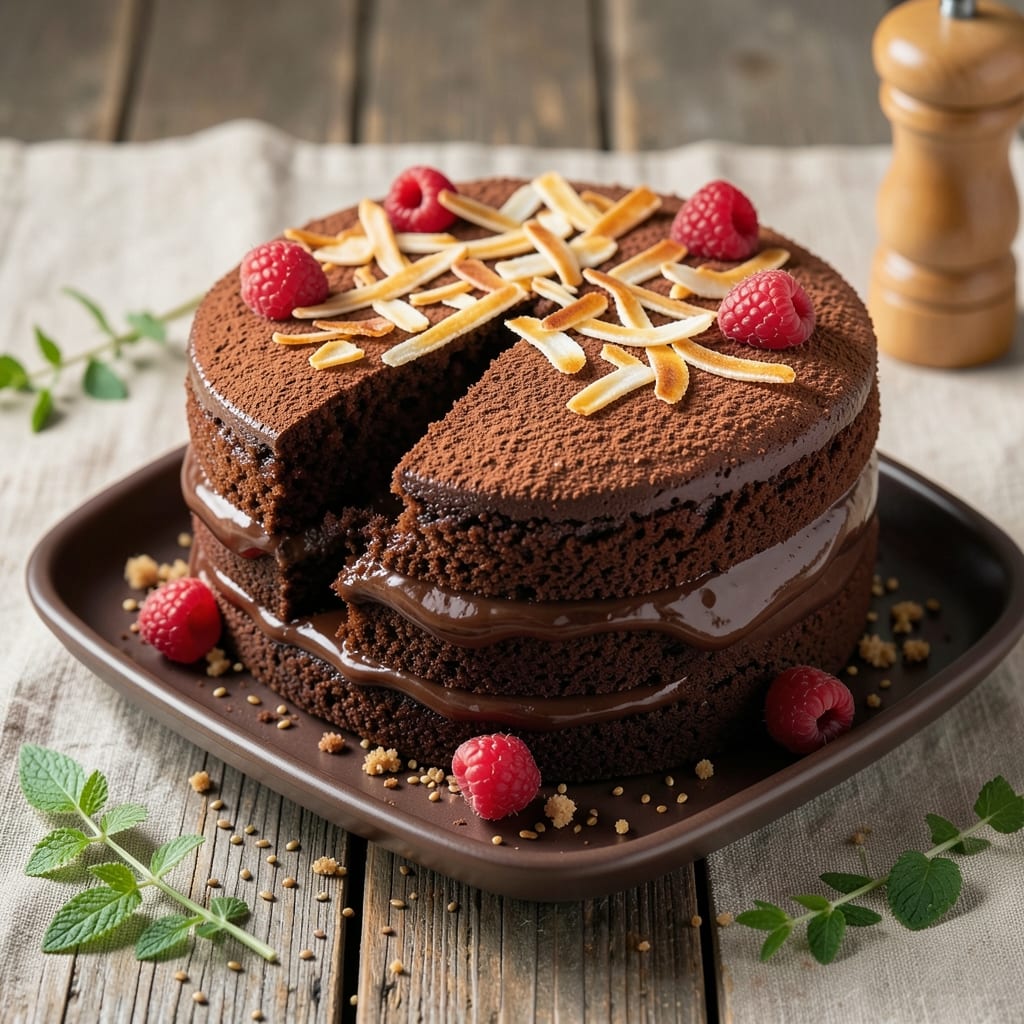
This dairy and egg-free chocolate cake delivers rich, fudgy layers that prove plant-based baking can be just as indulgent as traditional recipes. The secret lies in flax eggs and coconut oil, which create the perfect texture without compromising on moisture or depth of flavor. I've tested countless variations to ensure this cake rises properly, stays tender, and satisfies even the most devoted chocolate lovers.
What makes this recipe truly special is its foolproof method—no special equipment required beyond a standard mixing bowl and oven. The cake batter uses aquafaba (chickpea brine) as an egg substitute to achieve that signature lightness, while melted coconut oil replaces butter for a rich, velvety crumb. Baking at 350°F ensures even cooking, and the result is a cake with a moist interior and slightly crisp edges.
By the time it emerges from the oven, you'll have a decadent chocolate cake with layers that are dense yet tender, and a flavor so rich it rivals traditional recipes. The frosting—made with dairy-free butter and powdered sugar—adds another layer of indulgence without compromising dietary needs. This cake is perfect for birthdays, celebrations, or simply treating yourself to something extraordinary.
Whether you're baking for dietary restrictions or simply exploring plant-based options, this recipe delivers restaurant-quality results at home. The best part? Every bite is completely free of dairy and eggs, yet packed with the bold chocolate flavor you crave. Let's get started on creating your perfect vegan chocolate cake.
Ingredients for dairy and egg free chocolate cake
These 15 ingredients transform into a decadent, dairy-free, egg-free chocolate cake that rivals traditional recipes.
| Ingredient | Amount | Notes |
|---|---|---|
| All-Purpose Flour 🌾 | 2 cups | Sifted for best texture |
| Unsweetened Cocoa Powder 🍫 | ¾ cup | Natural or Dutch-processed |
| Granulated Sugar 🍚 | 1 ½ cups | Organic preferred for purity |
| Coconut Oil (Melted) 🥥 | 1 cup | Refined for neutral flavor |
| Aquafaba (Chickpea Brine) 🥫 | ½ cup | From canned chickpeas |
| Ground Flaxseed 🌱 | 3 tbsp | For flax eggs |
| Vanilla Extract 🌿 | 1 tbsp | Pure Madagascar preferred |
| Distilled White Vinegar 🍶 | 1 tbsp | For flax egg activation |
| Baking Soda 🧪 | ½ tsp | Aluminum-free preferred |
| Salt 🧂 | ½ tsp | Fine sea salt |
| Hot Water 💧 | ½ cup | For flax egg mixture |
| Dairy-Free Butter (Vegan) 🧈 | ½ cup | Miyoko's or Earth Balance |
| Powdered Sugar 🍚 | 2 cups | For frosting |
| Dark Chocolate Chips (Vegan) 🍫 | 1 cup | Enjoy Life brand |
| Espresso Powder (Optional) ☕ | 1 tbsp | Enhances chocolate depth |
The cocoa powder and flax eggs are absolute game-changers here. For the cocoa, Valrhona or Guittard brands deliver that rich, velvety texture—don't skimp on quality. The flax eggs require hot water to activate properly (mix flaxseed with water first, then let sit for 5 minutes). I always keep ground flaxseed in the pantry—it's a baking staple for vegan recipes. The coconut oil should be melted but not hot; let it cool slightly before mixing to avoid killing the aquafaba's volume. If you're new to aquafaba, save the brine from a can of chickpeas (about 0.5 cup) and whisk it until frothy—it's the secret to that perfect cake rise!
No cocoa powder? Melted dark chocolate (70% or higher) at 1:1 ratio works in a pinch, but the texture won't be identical. Swapping the coconut oil? Melted vegan butter or avocado oil both work, but coconut gives that signature moisture. The espresso powder is optional but worth it—it deepens the chocolate flavor without bitterness. For the frosting, Miyoko's or Earth Balance vegan butter melts beautifully and adds richness. If you can't find powdered sugar, blend granulated sugar in a food processor for 30 seconds. The chocolate chips? Enjoy Life brand is the only one I trust for allergy-friendly baking—no weird additives.
This batter keeps in the fridge for up to 3 days, covered tightly. The baked cake stays moist for 4-5 days wrapped in plastic, but honestly, it's best eaten fresh. For make-ahead prep, bake the cake layers, cool completely, then wrap individually in parchment and freeze for up to 2 months. Thaw overnight in the fridge before frosting. The frosting can be made 2 days ahead—just whip it up and store in an airtight container. Pro tip: Brush the cake layers with a simple syrup (equal parts sugar and water, heated) before frosting for extra moisture—trust me, it makes all the difference!
Why You'll Love This Recipe
- Pantry Magic: I swear by this one—no special trips, just flour, cocoa, and that leftover chickpea brine from your last hummus. The aquafaba whips up like a dream, no eggs needed, and the coconut oil keeps it moist without dairy.
- Rich Without Guilt: Between us, this cake tastes like it’s been sitting in a bakery window. The cocoa powder delivers that deep, velvety bite, while the sugar and coconut oil balance it out—no weird aftertaste, no heavy richness. It’s the kind of chocolate cake that makes you forget about dietary restrictions.
- Birthday to Brunch: Serve it warm with a scoop of vegan ice cream for a birthday celebration, or slice it cold for a quick breakfast with peanut butter. Honestly, I’ve even packed it in lunchboxes—kids love it, and it doesn’t get soggy.
- Zero Waste, Double Payoff: That chickpea brine? Usually, I toss it. Here, it’s the star. And the leftovers? They last days in the fridge, perfect for sneaking into smoothies or crumbling over oatmeal. Budget-friendly, clever, and no food goes unused.
Step-by-step instructions for dairy and egg free chocolate cake
This method delivers rich, fudgy layers with perfect texture—no eggs or dairy required!
👨🍳 Step 1: Prepare the Flax Eggs and Mix Dry Ingredients
In a small bowl, whisk together the 3 tablespoons ground flaxseed and 0.5 cup hot water. Let it sit for 5 minutes until it thickens into a gel-like consistency—this replaces eggs perfectly. In a separate bowl, sift together the 2 cups all-purpose flour, 0.75 cup unsweetened cocoa powder, 0.5 teaspoon baking soda, and 0.5 teaspoon salt. This ensures no lumps and creates a light, airy texture.
I always use a fine-mesh sieve for the dry ingredients—it prevents dense pockets in the cake. The cocoa powder should be sifted separately from the flour to avoid clumping, especially since we're using natural cocoa which can be gritty. Set both mixtures aside while you prepare the wet ingredients.
🍳 Step 2: Combine Wet Ingredients for Maximum Moisture
In a large mixing bowl, combine the 1 cup melted coconut oil, 1.5 cups granulated sugar, 1 tablespoon vanilla extract, and 1 tablespoon distilled white vinegar. Whisk vigorously for 2 minutes until the mixture is smooth and slightly thickened. The vinegar might seem odd, but it reacts with the baking soda to create lift—just like eggs would.
Add the 0.5 cup aquafaba (chickpea brine) and whisk for another 1 minute. You'll notice the mixture lighten and become frothy—this step is crucial for that signature cakey texture. If you're using the 1 tablespoon espresso powder, sprinkle it in now and whisk to dissolve completely. The espresso enhances the chocolate flavor without adding bitterness.
🥘 Step 3: Fold Wet and Dry Ingredients Gently
With the mixer on low speed, gradually add the dry ingredients to the wet mixture. Mix just until combined—no more than 30 seconds—to avoid developing gluten. Then fold in the 1 cup dark chocolate chips (vegan) by hand using a spatula. The dough will be thick but pourable, like fudge batter. This is exactly what we want for that signature fudgy texture.
Don't overmix here—this is where most people go wrong. The moment you see a few flour streaks remain, stop. Overmixing creates tough cake. The chocolate chips should be evenly distributed throughout the batter, with no clumps at the bottom of the bowl.
🔥 Step 4: Bake in Two Perfect Layers
Preheat your oven to 350°F. Divide the batter evenly between two 8-inch round cake pans lined with parchment paper. Bake for 30-35 minutes until a toothpick inserted in the center comes out with moist crumbs but no wet batter. The edges should be set but the top should still look slightly underbaked—it continues cooking as it cools.
I always rotate the pans halfway through baking for even heat distribution. The cake should spring back when gently pressed in the center. Let the cakes cool in the pans for 10 minutes, then transfer to a wire rack to cool completely. This resting period prevents cracking when you remove them from the pans.
🍰 Step 5: Frost and Assemble with Confidence
While the cakes cool, prepare the frosting by beating the 0.5 cup dairy-free butter (vegan) with the 2 cups powdered sugar until light and fluffy. Add 1 tablespoon vanilla extract and beat until smooth. Spread a thin layer on the first cake layer, then place the second layer on top. Frost the entire cake, then gently press the 1 cup dark chocolate chips (vegan) into the sides for decoration.
The frosting should be thick enough to hold its shape but still spreadable. If it's too stiff, add 1 teaspoon hot water and beat again. The chocolate chips add both visual appeal and bursts of flavor in every bite. For extra richness, you can drizzle melted dairy-free chocolate over the top before serving.
Pro Tips For Making Dairy And Egg Free Chocolate Cake
- WHISK AQUFABA FIRST: I learned this the hard way—whipping the aquafaba before adding sugar makes a noticeable difference. Start with the chickpea brine in a clean, grease-free bowl and whip it to stiff peaks before folding in the sugar, or you’ll end up with a cake that’s more dense than fudgy.
- SIFT THE COCOA: Skip the sifting? Your cake will taste uneven. Unsweetened cocoa powder clumps like a stubborn cat in a blanket, and those lumps turn into dry spots. Sift it directly into your dry ingredients, then whisk everything together—this guarantees a smooth, rich texture without bitterness sneaking through.
- DON’T OVERMIX THE BATTER: After adding the wet ingredients, stop mixing the second everything comes together. Overmixing develops gluten like you’re kneading bread dough, and your cake will turn out tough instead of tender. Two or three gentle folds with a spatula is all you need—yes, even if it looks lumpy.
- CHILL THE BATTER 10 MINUTES: This isn’t the prettiest method, but it’s the tastiest. After mixing, let the batter sit in the fridge for 10 minutes before baking. The aquafaba stabilizes, the flour absorbs moisture, and the cake rises more evenly—no more sunken centers or cracks on top. (Your future self will thank you.)
Storing and reheating this recipe
Fridge Storage
Store your fully assembled cake in an airtight container at 40°F or below for up to 5 days. The frosting will firm up slightly in the fridge, but it's perfect for celebrations the next day. I always slice it with a hot knife (dip in hot water, wipe dry) for clean cuts—this prevents crumbs from sticking to the blade. 💫
Freezer Prep
For longer storage, wrap individual cake layers in parchment paper and freeze them for up to 2 months. Thaw overnight in the fridge before frosting. The frosting can be made separately and stored in an airtight container for 3 days—just rewhip it before using. I recommend freezing unfrosted layers to prevent sogginess.
Reheating Slices
To revive room-temperature slices, warm them in the oven at 325°F for 5-7 minutes until the frosting softens slightly. For microwave reheating, cover with a damp paper towel and heat for 10-15 seconds on 50% power. This keeps the cake moist without melting the frosting completely.
Make-Ahead Tips
Bake the cake layers 2 days ahead and store them wrapped at room temperature. Frost just before serving to maintain texture. For parties, assemble the cake 1 day ahead and refrigerate—it actually tastes better after flavors meld! The chocolate chips stay crisp, and the frosting sets beautifully. ✨
Frosting Refresh
If your frosting looks dry after storage, simply rewhip it with 1 teaspoon hot water until smooth. For extra shine, brush the cake with 1 teaspoon apricot jam (warmed) before adding fresh frosting. This creates a glossy finish that makes your cake look restaurant-worthy. 🍰
Serving Warm
For a decadent twist, serve warm slices with a scoop of dairy-free vanilla ice cream. The contrast between the warm cake and cold ice cream is pure magic. I also love adding a sprinkle of flaky sea salt on top—it enhances the chocolate flavor dramatically. 💛
Nutrition facts
Frequently asked questions
Can I substitute aquafaba with another egg replacement?
Yes! If you don't have aquafaba, try 1/4 cup unsweetened applesauce or 1/4 cup mashed banana for the same volume. For best results, whisk it vigorously to incorporate air—this mimics the aquafaba's lightening effect. The flax eggs still need to be made separately for structure.
Why does my cake turn out dense instead of fudgy?
Overmixing the batter is the #1 culprit! Mix just until combined—30 seconds max after adding dry ingredients. Also ensure your coconut oil is melted but not hot (should be 100-110°F) and your oven is properly calibrated. Underbaking by 2-3 minutes also helps maintain moisture.
What's the best way to make this cake gluten-free?
Replace the all-purpose flour with a 1:1 gluten-free baking flour blend like Bob's Red Mill. Add 1/4 cup extra starch (like tapioca or arrowroot) to prevent crumbling. Sift all dry ingredients thoroughly and let the batter rest for 10 minutes before baking to hydrate properly.
Can I use this recipe for cupcakes instead?
Divide the batter into 12 standard cupcake liners (fill 2/3 full) and bake at 350°F for 18-22 minutes. For extra height, add 1/4 teaspoon baking powder to the dry ingredients. Top with dairy-free frosting or melted chocolate for a decadent treat!
How do I fix cracked cake layers?
Cracks usually happen from cooling too quickly. Let cakes cool in pans for 15 minutes before transferring, and avoid opening the oven door during baking. For minor cracks, simply frost over them—they won't affect flavor. For severe cracks, brush with simple syrup (equal parts sugar/water) before frosting to add moisture and smooth texture.