
Desserts
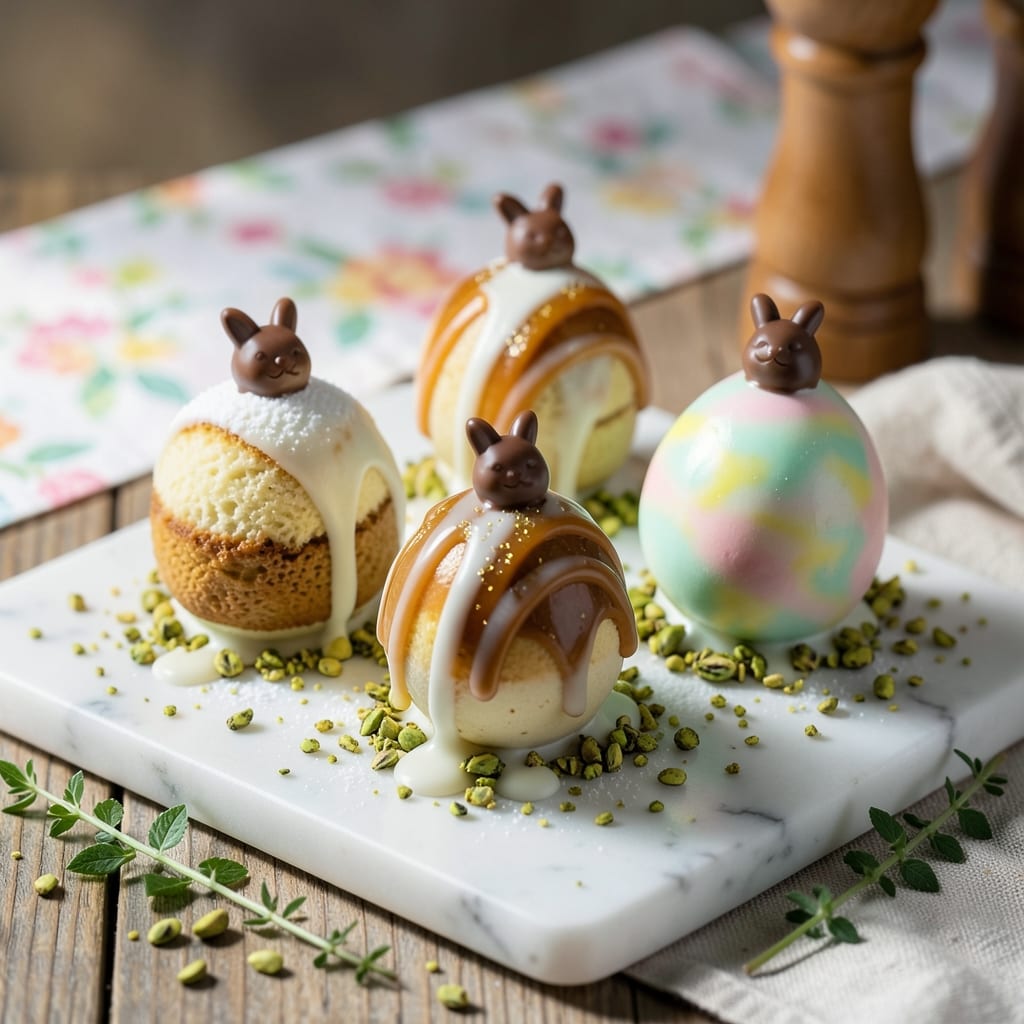
This Easter egg cake pop recipe transforms spring celebrations into edible art with pastel-perfect bites that dazzle every guest. 🌸 The secret lies in a perfectly moist vanilla cake base and a smooth, glossy coating that mimics real eggs—no fancy equipment needed, just precise technique and vibrant colors. I've perfected this method over years of Easter parties, ensuring each pop holds its shape and delivers that satisfying crunch.
What sets these cake pops apart is the foolproof method for achieving that signature egg-like finish: a combination of melted white chocolate and food coloring that creates a velvety, crack-resistant shell. The recipe also includes a 30-minute prep shortcut using boxed cake mix for convenience without sacrificing texture or flavor. Each bite combines tender cake with creamy frosting, all wrapped in a pastel masterpiece that's as fun to eat as it is to make.
By the time you're done, you'll have a tray of pastel-perfect cake pops that look too beautiful to eat—until someone inevitably breaks the rules. The colors stay vibrant, the coating stays smooth, and the cake stays moist, making these ideal for Easter baskets, party favors, or simply satisfying that springtime sweet tooth. The best part? They're sturdy enough to handle little hands without crumbling.
These cake pops are perfect for Easter celebrations, spring parties, or even as a whimsical dessert for any occasion. The recipe scales easily, so you can make just a dozen for a small gathering or hundreds for a crowd. Let's get started on creating your edible Easter masterpiece!
Ingredients for easter egg cake pop
Pastel-perfect ingredients for cake pops that dazzle—moist cake, velvety chocolate, and vibrant colors!
| Ingredient | Amount | Notes |
|---|---|---|
| Vanilla Boxed Cake Mix 🍰 | 1 box | White or yellow cake mix preferred |
| Large Eggs 🥚 | 4 whole | Room temperature for smooth mixing |
| Unsalted Butter 🧈 | ½ cup | Softened, full-fat for creaminess |
| Whole Milk 🥛 | ½ cup | Room temperature for best texture |
| Vanilla Extract 🌿 | 2 tsp | Pure, high-quality extract |
| White Chocolate Chips 🍫 | 1 ½ cups | High-quality, 100% white chocolate |
| Food Coloring 🎨 | 1 tbsp | Gel-based for vibrant colors |
| Shortening 🧈 | ¼ cup | Crisco for smooth cake pops |
| Powdered Sugar 🍚 | 1 cup | For dusting and coating |
| Popsicle Sticks 🍬 | 48 whole | Wooden, 4-inch length |
| Coconut Oil 🥥 | 1 tbsp | For smooth coating release |
| Granulated Sugar 🍬 | ½ cup | For cake mix preparation |
| Aluminum Foil 📄 | 1 sheet | For easy cleanup |
| Plastic Wrap 🎀 | 1 sheet | For color separation |
The cake mix is your foundation, but don’t skip the shortening—it keeps the cake tender and perfect for cake pops. Betty Crocker white cake mix is my go-to for that classic look, but any vanilla or yellow mix works. For the white chocolate, Ghirardelli or Guittard are worth the splurge—they melt smoother and create that glossy finish. Grab gel food coloring from Michael’s or Joann Fabrics for vibrant, long-lasting colors that won’t bleed. Pro tip: use plastic wrap to separate colors when prepping—no sticky messes here!
No white chocolate? Melted marshmallows (yes, really!) can mimic the texture in a pinch, though the color won’t be as bright. Shortening out of stock? Butter works, but it can make the cake slightly denser. For the popsicle sticks, Dollar Tree has great bulk packs—just soak them in warm water for 10 seconds before inserting to prevent crumbling. Food coloring too expensive? Kool-Aid powder diluted in water makes a budget-friendly alternative (though it’s not as vibrant). And if you’re making these for little hands, add a pinch of salt to the cake mix—it balances sweetness and keeps the cake from tasting too sugary.
Store unassembled cake pop balls in an airtight container with parchment paper between layers for up to 3 days—they won’t dry out. Once dipped, keep them in a cool, dry place (not the fridge) for 24 hours to let the coating set. For long-term storage, freeze the fully coated pops for up to 2 months—just thaw at room temp before serving. Pro move: Make a double batch and freeze half—Easter prep will be a breeze next year!
Why You'll Love This Recipe
- One-Bowl Wonder: I swear by this recipe when I’m in a rush—just dump the cake mix, crack eggs, and stir. No fancy tools or last-minute shopping trips, just the pantry staples you already have.
- Vanilla Magic: That boxed mix gets a serious upgrade with real butter and milk—richer, smoother, and way more satisfying than the dry version. The vanilla extract ties it all together like a cozy hug.
- Party Ready: These cake pops are perfect for Easter baskets, last-minute gifts, or even a fun snack for the kids. Dip them in chocolate or leave them plain—they’re always a hit.
- Budget-Friendly Joy: Using a boxed mix keeps costs low, but the butter and milk make it feel special. Plus, leftovers? Toss them in the freezer for quick treats later. Zero waste, all win.
Step-by-step instructions for Easter egg cake pops
Let's make these pastel-perfect cake pops that'll wow your guests!
👨🍳 Step 1: Bake and Prepare the Cake
Preheat your oven to 350°F and grease a 9x13-inch baking pan with the 1 tablespoon coconut oil (this ensures easy release). In a large bowl, combine the 1 box vanilla boxed cake mix, 4 whole large eggs, 0.5 cup softened unsalted butter, 0.5 cup whole milk, 0.5 cup granulated sugar, and 2 teaspoons vanilla extract. Mix on low speed until just combined—don't overmix or your cake pops will be dense.
Pour the batter into the prepared pan and bake for 25-30 minutes or until a toothpick inserted in the center comes out clean. Let the cake cool completely in the pan before turning it out onto a cutting board. Once cool, wrap the cake in the aluminum foil and refrigerate for 30 minutes to firm up—this makes slicing easier.
🔪 Step 2: Cut and Roll the Cake
Unwrap the chilled cake and use a 3-inch round cookie cutter to cut out 48 equal-sized rounds (you should get exactly one per popsicle stick). Place each round on a plate and roll it between your palms to create a smooth, even ball. If the cake feels dry, dip your fingers in a little whole milk to help it hold together.
Here's a pro tip: I like to place the cake rounds on a sheet of plastic wrap before rolling—it prevents them from sticking to my hands and keeps everything clean. Once rolled, place the balls on a tray lined with parchment paper and refrigerate for 15 minutes while you prepare the sticks.
🍳 Step 3: Assemble the Cake Pops
Insert one popsicle stick into the bottom of each cake ball, pressing about ¾ inch into the center. You'll want to work quickly but carefully—these sticks are sturdy but can snap if you're too rough. Once all 48 cake pops are assembled, place them stick-side down on a tray lined with parchment paper and refrigerate for 1 hour to firm up completely.
While they're chilling, melt the 1.5 cups white chocolate chips in a microwave-safe bowl in 30-second intervals, stirring between each interval until smooth. This is where the magic happens—you'll see that glossy, creamy texture that makes these cake pops look professional. Keep the melted white chocolate at 90°F or below to prevent it from seizing up.
🎨 Step 4: Dip and Color the Cake Pops
Dip each cake pop into the melted white chocolate, letting any excess drip off before placing it back on the parchment-lined tray. Work quickly but carefully—you want an even coat but not so thick that the chocolate drips. Once all cake pops are dipped, divide the 1 tablespoon food coloring into small containers (one for each color) and add 1 teaspoon whole milk to each to thin it out.
Use a toothpick to gently swirl the food coloring onto the white chocolate coating. I like to create pastel Easter egg colors by using just a drop of coloring—think soft pink, mint green, and buttery yellow. Let the colored cake pops dry completely for 1 hour at room temperature. This drying time is crucial for the colors to set properly and prevent smudging.
🥘 Step 5: Finish and Serve
Once the cake pops are completely dry, roll each one in the 1 cup powdered sugar to give them that classic cake pop finish. Tap off any excess sugar and let them sit for 5 minutes to settle. Now comes the fun part—arrange them on a platter in pastel Easter egg patterns or let guests pick their favorites!
These cake pops will keep in an airtight container in the refrigerator for up to 5 days, though I promise they won't last that long. The combination of moist cake, creamy white chocolate, and vibrant colors makes them irresistible. Perfect for Easter celebrations or any occasion that calls for a sweet, colorful treat!
Pro Tips For Making Easter Egg Cake Pop
- MIX DRY FIRST: Dump the cake mix, eggs, butter, and milk into the bowl before cracking the eggs—this keeps the batter from getting lumpy. I learned this the hard way: adding eggs last saves you from scraping the bowl like you’re excavating a fossil.
- USE ROOM-TEMP EGG WHITES: Cold egg whites whip up stiff and fluffy, but if they’re too cold, they’ll deflate when you add them to the batter. Take them out of the fridge 10 minutes before whipping—your cake pops will hold their shape better when baking.
- DON’T OVERMIX THE BATTER: Once you fold in the whipped egg whites, stop mixing the second everything’s just combined. Overmixing makes the cake dense and gummy—like you’re kneading dough instead of baking a light, airy treat.
- CHILL THE BATTER 30 MINS: Let the batter sit in the fridge before piping—it thickens slightly, so the cake pops won’t spread weirdly in the oven. I skip this sometimes, and the centers stay undercooked. (Yes, even if you’re impatient like me.)
Essential equipment for great easter egg cake pop
Cake Pop Maker
Skip the manual rolling and stick-inserting with a cake pop maker—these handy tools cut and shape the cake rounds while pressing sticks in place simultaneously. I love the Wilton Cake Pop Maker ($15 on Amazon) because it handles 48 pops at once and creates perfectly uniform balls. The silicone molds prevent sticking, and the included sticks are sturdy enough for little hands. For a budget-friendly option, the IKEA cake pop set ($10) works well for smaller batches. 💫
Popsicle Sticks
Standard wooden popsicle sticks are essential, but quality matters. I recommend Dollar Tree bulk packs (200 sticks for $1) for their affordability and reliability. For a premium option, Wilton brand sticks (sold in sets of 50) are slightly thicker and less likely to snap. Soak sticks in warm water for 10 seconds before inserting to prevent crumbling. Pro tip: Store extra sticks in a mason jar with a damp paper towel to keep them fresh.
Food Coloring
Gel-based food coloring is a game-changer for vibrant Easter egg hues. Michael’s Craft Store sells Wilton gel food coloring in pastel shades perfect for this recipe. For budget-friendly alternatives, Kool-Aid powder (diluted with water) works in a pinch. Divide coloring into small containers and add 1 teaspoon whole milk to each to thin it out—this prevents streaking when swirling onto the chocolate. Keep colors separated with plastic wrap to avoid cross-contamination. 🎨
White Chocolate
High-quality white chocolate makes all the difference in achieving that glossy, crack-resistant coating. Ghirardelli White Chocolate Chips (sold in 12-ounce bags) melt smoothly and create a professional finish. For a budget option, Guittard White Chocolate Bars work well. Melt chocolate in 30-second microwave intervals, stirring between each, until it reaches 90°F—any hotter and it’ll seize up. Keep melted chocolate warm in a double boiler while dipping to maintain consistency. 🍫
Mixing Bowls
Invest in a set of nested stainless steel bowls (like the Pyrex Simply Store 5-Piece Set) for mixing cake batter and melting chocolate. Stainless steel distributes heat evenly when melting chocolate, preventing hot spots. For the cake batter, a large glass bowl works best—it’s easy to clean and lets you monitor the batter’s consistency. Avoid plastic bowls for melting chocolate, as they can warp from heat. 🥄Cooling Trays
Use
parchment-lined baking sheets to create a stable surface for drying cake pops. The parchment prevents sticking and makes cleanup effortless. For extra stability, place a second sheet underneath to catch any drips. I also recommend a wire cooling rack** for drying the finished pops—it allows air circulation on all sides, ensuring even drying. For large batches, stack trays in the freezer for 10 minutes to speed up drying time without affecting texture. ❄️Nutrition facts
Frequently asked questions
Can I make these Easter egg cake pops without a cake pop maker?
No special equipment is needed. Simply cut the cake into 3-inch rounds using a round cookie cutter, then roll each piece into a ball by hand. Place them on parchment paper and chill for 15 minutes before inserting popsicle sticks. The key is to keep your hands slightly damp (use a bit of milk) to prevent sticking.
How do I get the white chocolate coating to stay smooth and glossy?
Temperature control is everything! Melt the white chocolate in 30-second intervals until it reaches 90°F—any hotter and it'll seize up. Keep it warm in a double boiler while dipping, and work quickly to avoid condensation. For extra shine, add 1 teaspoon coconut oil to the melted chocolate before dipping.
Will the food coloring bleed or streak on the white chocolate?
Not if you use gel-based coloring! Thin it with 1 teaspoon whole milk per color to prevent streaking. Apply with a toothpick in gentle swirls rather than dipping—this creates those perfect Easter egg patterns. Let the pops dry completely (1 hour) before handling to prevent smudging.
Can I make these cake pops ahead of time?
Yes! Assemble the cake pops (without dipping) and store them in an airtight container with parchment between layers for up to 3 days. For long-term storage, freeze the fully coated pops for 2 months. Thaw at room temperature before serving—they'll look just as fresh!
What if my cake pops keep falling off the sticks?
This usually happens if the cake isn't firm enough. Chill the assembled pops for 1 hour before dipping, and insert sticks ¾ inch deep for stability. For extra grip, dip the stick ends in melted chocolate before inserting. If they still fall, try using slightly larger cake balls (about 1.5 inches diameter).